Table of Contents
Introduction
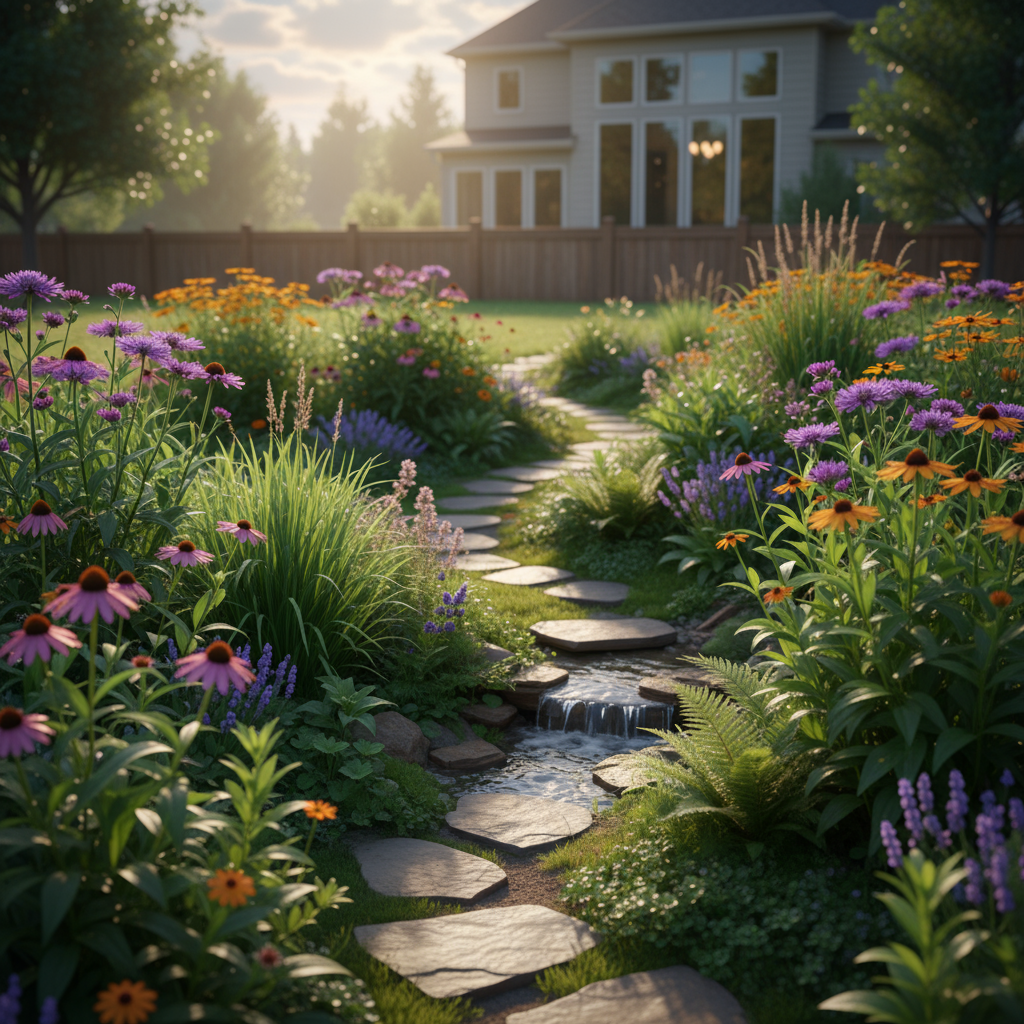
Picture this: you’re watching sheets of rain pound your yard, and instead of soaking into the ground, all that water is rushing toward the street—taking topsoil and who knows what else with it. Frustrating, right? Here’s where rain gardens come in. They’re like nature’s own sponges, designed to catch and soak up all that runoff while turning your yard into something absolutely gorgeous.
Think of rain gardens as your landscape’s superhero. They tackle flooding, reduce pollution, and give you a stunning garden feature all at once. The best part? You’re working with nature instead of fighting against it. By creating a spot that mimics how water naturally soaks into the ground, you’re helping reduce runoff and taking pressure off those overwhelmed storm drains. If you’re wondering how to make a rain garden, don’t worry—it’s more straightforward than you might think. Sure, there’s some planning involved, but once you get the hang of it, rain gardens are surprisingly low-maintenance.
But here’s what really gets me excited about rain gardens: they’re wildlife magnets. Birds love them. Pollinators go crazy for them. When you choose native plants that can handle both soggy springs and dry summers, you’re creating a habitat that thrives year-round. Want to dive deeper into plant selection? Resources on sustainable agriculture techniques can give you some great insights. Plus, you’re joining a bigger movement—connecting your little patch of earth to community-wide efforts that actually make a difference.
Now, let’s talk location. You’ll want to scout your yard like a detective, watching where water naturally wants to go during storms. (Trust me, it has opinions about this.) Pay attention to your soil—does it drain well or does it hold water like a bathtub? How much sun does the area get? These details matter more than you might think. Many communities are embracing natural pest control methods and soil conservation that work hand-in-hand with rain garden care. It’s all about creating that balanced ecosystem right in your backyard.
What You’ll Learn in This Guide
We’re going to walk through this together, step by step. By the time we’re done, you’ll have everything you need to create a rain garden that’s both beautiful and incredibly functional.
- Understanding Rain Gardens: We’ll start with the basics—what they are, how they work their magic, and why they’re becoming such a big deal in sustainable landscaping.
- Planning and Site Assessment: You’ll learn to read your yard like a pro, finding that perfect spot and understanding what your soil and drainage patterns are telling you.
- Step-by-Step Building Process: From breaking ground to shaping your garden bed, we’ll cover every detail you need to create a space where water can do its thing naturally.
- Plant Selection and Maintenance: Choose plants that’ll thrive in your specific conditions, learn the tricks for getting them established, and discover how to keep your garden looking amazing with minimal fuss.
Throughout this guide, I’ll share practical tips, real-world examples, and those little details that can make the difference between a garden that just survives and one that truly thrives. You might want to check out some green technology innovations while you’re at it—it’s pretty amazing to see how your rain garden fits into the bigger picture of environmental solutions.
By the end, you’ll have the confidence to transform any soggy problem area into an eco-friendly showstopper. Whether you’re brand new to gardening or you’ve got dirt permanently under your fingernails, this guide meets you where you are. Ready to turn that drainage headache into your yard’s best feature?
Your rain garden adventure starts right here. We’re talking about smart water management, happy wildlife, and a landscape that’ll make your neighbors stop and stare (in the best way). Let’s dig in and make this happen!
So you’ve got the basics of rain gardens down—now let’s get into the real nitty-gritty of actually building one. Here’s the thing: rain gardens aren’t just pretty landscaping features (though they definitely can be beautiful). They’re workhorses for managing stormwater, and when you design one right, you’re creating something that’ll serve your property and the environment for years to come. But here’s where it gets interesting—creating an effective rain garden means working with nature, not against it. You’ll need to read your landscape like a map, understanding how water wants to flow and where your plants will be happiest. Let’s walk through this together, step by step, so you can create a rain garden that’s both functional and gorgeous.
Planning Your Rain Garden for Sustainable Stormwater Management
Okay, let’s talk planning—because this is where most people either set themselves up for success or create a beautiful mess. First things first: you need to become a detective of your own yard. Walk around after a good rain and see where water naturally pools. Notice how it flows across your landscape. Those low spots? They’re telling you something important. Next up is the soil test—and I’m not talking about anything fancy here. Dig a hole about a foot deep, fill it with water, and see how quickly it drains. If it’s gone in 24 hours, you’re golden. If it’s still sitting there like a tiny pond, you’ll need to work on drainage. And don’t forget about sunlight—your plants need to know what they’re signing up for. Native plants are your best friends here because they’ve already figured out how to handle your local weather mood swings. For some hands-on guidance that really breaks this down, check out this practical guide on how to make a rain garden—it’s packed with site evaluation tips that’ll save you headaches later.
Now, here’s where the magic happens in the design phase. You’re not just digging a hole and hoping for the best. Shape matters—curves work better than straight lines because they mimic how water naturally wants to move. Depth is crucial too. Too shallow and you’ll have water spilling everywhere during heavy downpours. Too deep and your plants will be swimming instead of growing. Think Goldilocks zone here—just right. And here’s something most people forget: plan for the crazy storms. You need overflow areas because Mother Nature doesn’t always follow your garden’s capacity limits. Mixing some compost and sand into your native soil creates the perfect growing medium—good drainage but still holds enough moisture to keep your plants happy. Speaking of working with nature, if you’re interested in the bigger picture of protecting our waterways, this resource on water pollution reduction strategies shows how your rain garden fits into the larger environmental puzzle.
Key Aspects of Rain Garden Planning
Let me break down the essential elements you need to nail during the planning phase. Trust me, spending time on these details upfront will save you from having to redo things later:
- Site Assessment: Identify natural water collection zones, evaluate drainage rates through simple soil tests, and observe sun exposure patterns throughout the day. This comprehensive evaluation ensures maximum water capture and appropriate plant selection for your garden’s location.
- Garden Shape and Depth: Choose a curved or irregular shape that fits your landscape and allows efficient runoff capture. Design the depth to hold runoff volume safely while promoting healthy plant growth and avoiding erosion.
- Constructing Overflow Areas: Plan designated spill zones with mulch or gravel to handle excess water. These areas prevent flooding and channel overflow safely to storm drains or vegetated swales.
- Native Plant Selection: Prioritize native perennials and grasses with deep root systems that stabilize soil, promote infiltration, and provide habitat for local wildlife. Stagger bloom periods to maintain year-round beauty and ecosystem function.
Good planning sets you up for a rain garden that actually works—not just something that looks nice for the first season and then becomes a maintenance nightmare. Once you’ve got your plan locked down, the construction part becomes much more straightforward.
Preparing and Building Your Rain Garden: Soil, Excavation, and Planting
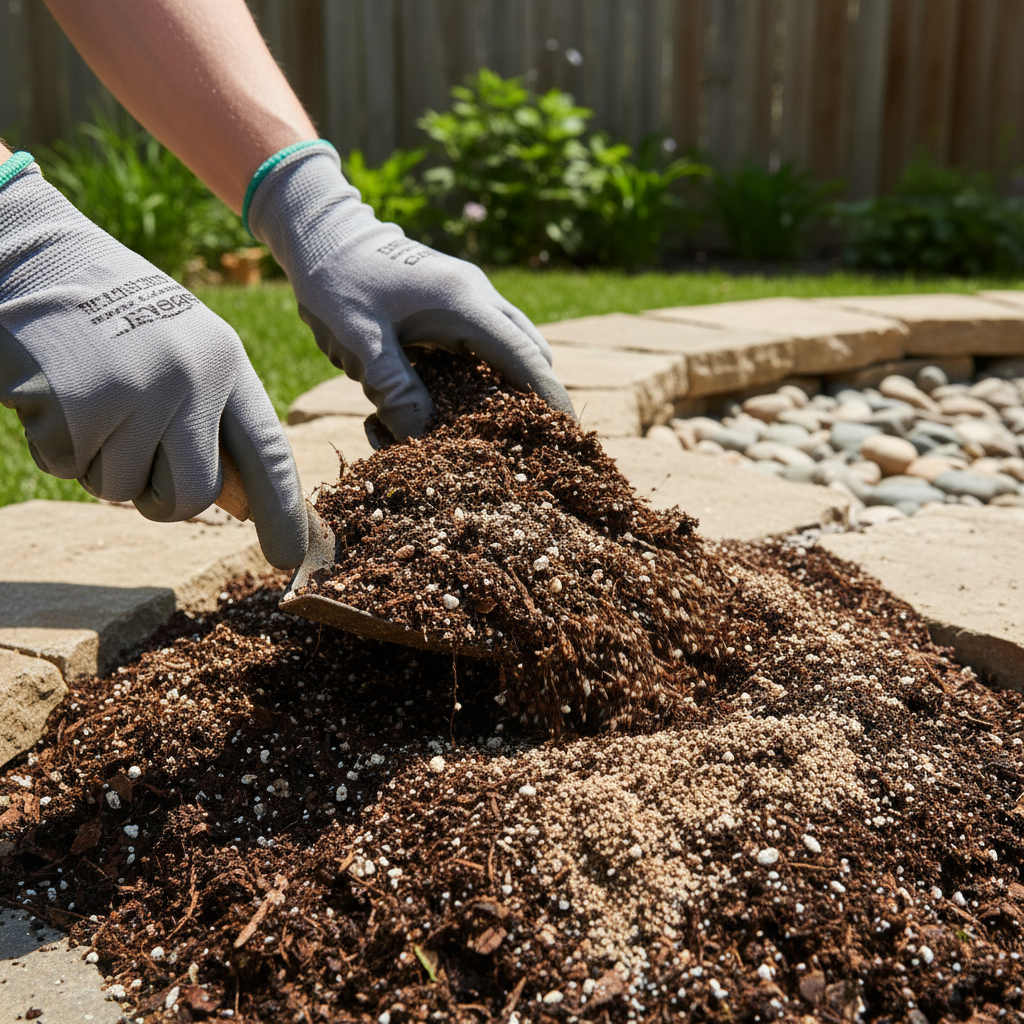
Alright, time to get your hands dirty! Building your rain garden is where all that planning pays off. First up: soil prep. This might not be the most exciting part, but it’s absolutely critical. You want to create a growing medium that drains well but doesn’t turn into concrete when it dries out. Here’s my go-to mix: take your existing soil and blend in some organic compost (for nutrients and structure) plus some coarse sand (for drainage). Don’t use fine sand—that’ll turn your garden into cement. The goal is soil that feels loose and crumbly in your hands. If you want to really dial in your soil prep game, this guide on how to prepare garden soil has some excellent techniques that work perfectly for rain garden projects.
Now comes the fun part—excavation. (And by fun, I mean the part where you realize you should have skipped that second cup of coffee this morning.) Follow your design exactly here. No “close enough” measurements—precision matters when you’re trying to manage water flow. Remove all the existing grass and weeds, but try not to compact the soil as you work. Think gentle slopes rather than steep sides—water should flow in gracefully, not crash like a waterfall. Once you’ve got your shape right and your amended soil in place, it’s time for the plant party. This is where native species really shine—they’re already adapted to your local conditions and won’t throw tantrums when the weather gets weird. For some inspiration on choosing the right natives for your space, this comprehensive guide on gardening with native plants is fantastic for understanding which species will thrive in your rain garden environment.
Key Aspects of Building Your Rain Garden
The construction phase is where your planning becomes reality. Here’s what you need to focus on to get it right:
- Excavation Accuracy: Follow design specifications closely to maintain intended depth and shape. Remove turf and debris completely to prevent future obstruction and ensure proper water absorption.
- Soil Amendments: Enhance native soil with organic compost to improve fertility and sand to boost drainage. This balance helps retain moisture without waterlogging, supporting diverse plant life.
- Planting Strategy: Position plants according to their water tolerance: moisture-loving species in lower areas and drought-tolerant plants on raised edges for optimal growth and garden health.
- Ongoing Maintenance Considerations: Plan for mulching to retain moisture, control weeds, and protect roots. Regular inspection and weeding preserve garden function and aesthetics over time.
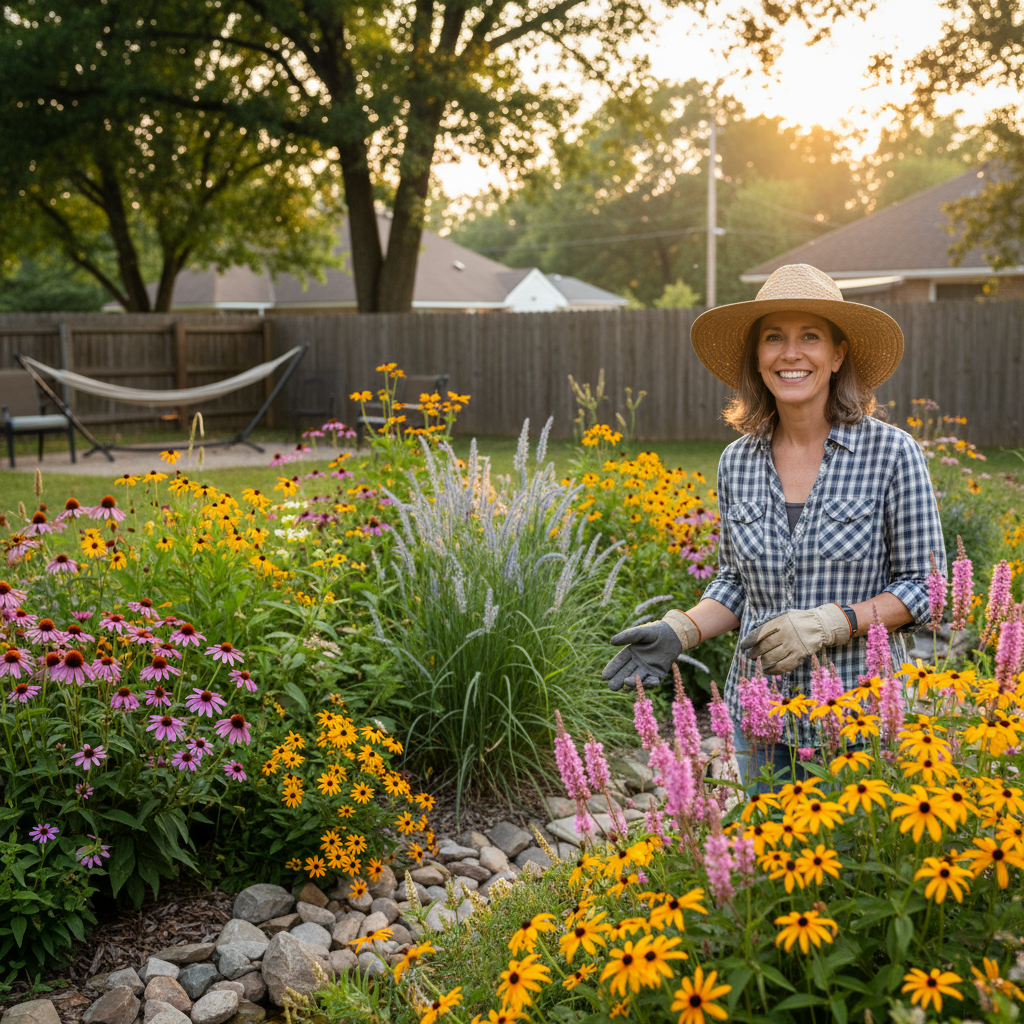
Here’s the thing about rain gardens—they’re absolutely brilliant. You get to tackle two problems at once: managing all that stormwater that usually runs off your property (causing flooding and erosion headaches) while creating something genuinely beautiful. Think of it as nature’s own filtration system, cleaning pollutants before water makes its way to local streams and rivers. The secret? Finding the right spot, getting your garden depth just right, improving that soil drainage, and choosing native plants that can handle both soggy springs and dry summers. What you end up with isn’t just a garden—it’s a thriving little ecosystem that birds, butterflies, and beneficial bugs absolutely love.
The actual building part? It’s more straightforward than you might think. Start by checking how water moves across your property and where the sun hits throughout the day. Then comes the fun part—digging! You’ll want gentle slopes that guide water naturally, and don’t forget to work some compost or sand into that soil to help it drink up all that rainwater. Now, plant selection is where things get interesting. Native perennials and grasses with deep root systems are your best friends here—they’ll hold everything together and keep the water flowing down instead of running off. Pro tip: group your plants by how much water they can handle. Some love having wet feet, others prefer to dry out between storms.
Ready to dive deeper into sustainable gardening? (Trust me, once you start, it’s addictive.) You’ll want to explore gardening with native plants—it’s a game-changer for supporting local wildlife. And since soil is everything in gardening, check out these insights on how to prepare garden soil for healthier plants overall. If you’re working with limited space or tricky soil conditions, you might love learning about raised bed gardening advantages—it’s perfect for optimizing what you’ve got to work with. And here’s something we can’t ignore: our water resources need all the help they can get. That’s why understanding water pollution reduction strategies matters so much for the bigger picture.
Look, building a rain garden isn’t just about digging a hole and planting some flowers. It’s about working with nature instead of against it—and honestly, that feels pretty amazing. When you watch your garden handle a heavy downpour like a champ, filtering that water naturally while looking gorgeous, you’ll get it. You’re not just solving a drainage problem; you’re creating habitat, supporting local wildlife, and showing your neighbors what’s possible. Every rain garden built is a small victory for sustainability. Yours could be the inspiration that gets your whole neighborhood thinking differently about stormwater.
Frequently Asked Questions
-
What is a rain garden?
- A rain garden is a planted depression that absorbs rainwater runoff from roofs and driveways.
-
How do I choose plants for my rain garden?
- Select native plants that can tolerate both wet and dry conditions.
-
Can a rain garden prevent flooding?
- Yes, it helps reduce runoff by absorbing water and slowing its flow.
-
How often do I need to maintain my rain garden?
- Regular maintenance includes watering during dry spells, weeding, and mulching annually.
-
Do rain gardens attract wildlife?
- Yes, they can provide habitat and food for beneficial insects and birds.