Gas Dryer Hookup: Safety Tips from Experts
A gas dryer hookup is a critical home installation that demands precision, knowledge, and adherence to safety protocols. Whether you’re installing a new gas dryer or replacing an existing one, understanding the proper procedures protects your family from carbon monoxide exposure, gas leaks, and fire hazards. This comprehensive guide draws from expert recommendations and industry standards to help you navigate the installation process safely and effectively.
Gas dryers offer significant energy efficiency advantages compared to their electric counterparts, making them an attractive choice for many households. However, the gas connection itself requires careful attention to detail. Improper hookup can lead to dangerous situations including undetected gas leaks, incomplete combustion, and inadequate venting. By following expert-recommended safety practices, you can enjoy the benefits of gas drying technology while maintaining a secure home environment for your family.
Understanding Gas Dryer Components and Safety Standards
Before beginning any gas dryer hookup installation, you must understand the critical components involved. A gas dryer requires three essential connections: the gas supply line, the electrical outlet for ignition and controls, and the exhaust vent. Each component plays a vital role in safe operation. The gas supply line delivers fuel to the burner, the electrical system ignites the gas and controls temperature settings, and the vent removes moisture and combustion byproducts from your home.
Industry standards, established by organizations like the National Fire Protection Association (NFPA) and the American Gas Association, mandate specific requirements for gas appliance installation. These standards exist because improper installation can result in carbon monoxide poisoning, a silent and potentially fatal hazard. The NFPA 54 code, also known as the National Fuel Gas Code, provides detailed specifications for gas piping, connections, and safety measures that professionals follow and homeowners should understand.
Your gas dryer must comply with local building codes, which often exceed minimum national standards. Before purchasing or installing a dryer, contact your local building department or EPA guidelines on carbon monoxide safety to understand specific requirements in your area. Some jurisdictions require licensed professionals to perform all gas connections, while others permit homeowner installations with proper permits and inspections.
[IMAGE_1]
Pre-Installation Inspection and Preparation
Proper preparation prevents problems during installation. Begin by inspecting your existing gas line infrastructure. If you’re replacing an old dryer with a new one, examine the current gas connection point carefully. Look for signs of corrosion, damage, or deterioration. Flexible connectors should be replaced if they show any wear, as they typically have a lifespan of 5-7 years. Rigid copper or steel piping, if properly installed, can last much longer but should still be inspected for integrity.
The gas shutoff valve is your first line of defense in case of emergency. Locate it and ensure it operates smoothly. You should be able to turn it off quickly and completely. If the valve is stiff, corroded, or difficult to operate, contact a professional to have it replaced before proceeding with dryer installation. Additionally, check that you have adequate access to the shutoff valve—it should never be blocked by appliances or storage.
Examine the space where your dryer will be installed. Ensure proper clearance according to manufacturer specifications, typically 4-6 inches from walls on the sides and back. Verify that your electrical outlet is properly grounded and can handle the dryer’s electrical requirements. For a gas dryer hookup, you’ll need a standard 120-volt outlet for the ignition system and controls, even though the heat source is gas.
Prepare your workspace by clearing the installation area of obstacles. Have the necessary tools and materials ready: an adjustable wrench, pipe tape (also called PTFE tape), a gas line connection kit appropriate for your dryer model, and a bubble level. Read your specific dryer’s installation manual thoroughly—different manufacturers may have unique requirements or specifications that supersede general guidelines.
Gas Line Connection Best Practices
The actual gas line connection is where precision matters most. Never use old connections or reuse fittings from previous installations. Each connection point should use new, appropriate fittings rated for natural gas or propane, depending on your fuel source. The most common connection method uses a flexible stainless steel connector with NPT (National Pipe Thread) fittings on each end.
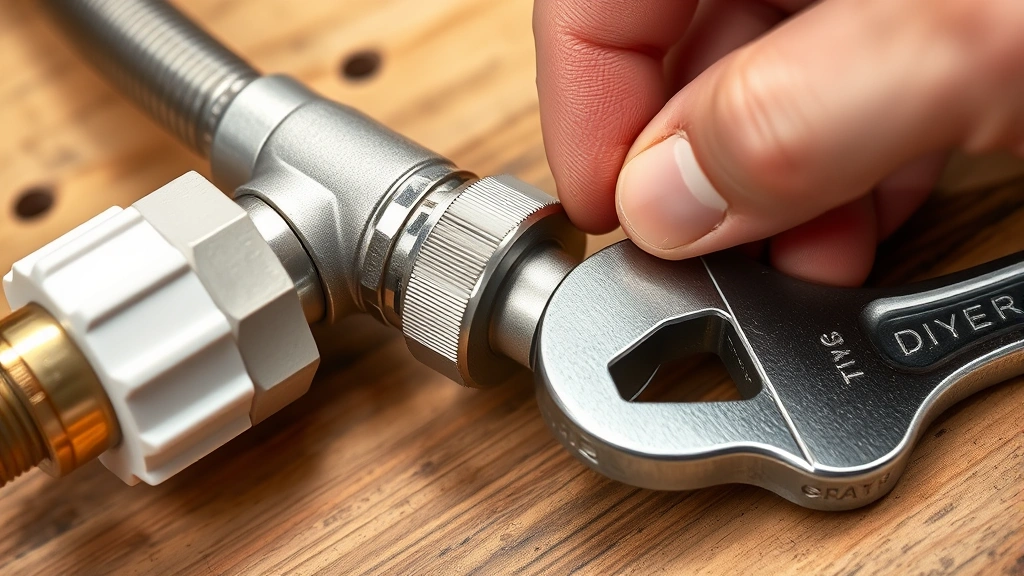
When connecting the gas line, follow these expert-recommended steps: First, ensure the gas supply is completely shut off at the main valve. Second, disconnect any existing dryer from the gas line if applicable. Third, apply pipe tape (PTFE tape) to the male threads of the gas inlet fitting on your new dryer—wrap it clockwise around the fitting three to four times. This tape creates a watertight seal and prevents gas leaks at the connection point.
Connect the flexible gas connector to the dryer’s inlet fitting by hand-tightening first, then using an adjustable wrench to tighten it an additional three-quarter turn. Over-tightening can damage the fitting and cause leaks; under-tightening leaves gaps where gas can escape. The connection should be snug but not forced. Repeat this process at the supply line end of the connector, ensuring both connections are equally secure.
For permanent installations using rigid piping rather than flexible connectors, you may need to solder copper fittings or use compression fittings designed for gas service. This work typically requires professional expertise and proper equipment. If your home’s gas infrastructure requires rigid piping modifications, consult the American Gas Association for certified professionals in your area.
After making all connections, perform an initial visual inspection. Look for any signs of damage, misalignment, or incomplete connections. Check that all fittings are properly seated and tight. Before turning the gas back on, ensure the dryer’s gas inlet valve is in the “off” position to prevent gas from flowing into the appliance during the initial test phase.
Venting System Requirements and Installation
The exhaust vent system is as critical as the gas connection itself. A properly installed vent removes moisture, heat, and combustion byproducts from your home while maintaining the dryer’s efficiency. Most building codes require venting to the outdoors; indoor venting is generally prohibited because it releases moisture and potential contaminants into your living space.
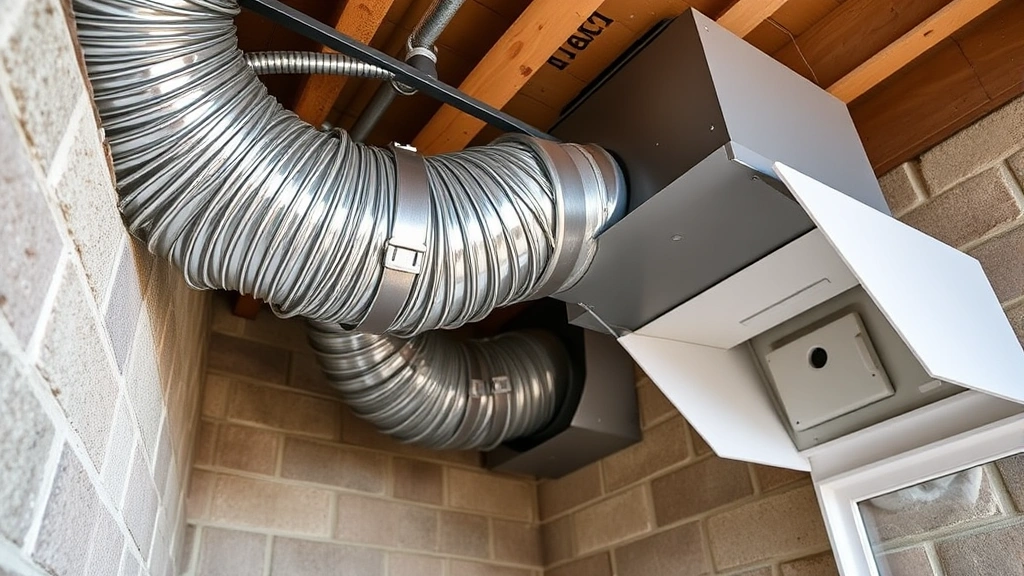
Venting systems typically use rigid metal ducts or flexible metal connectors. Rigid ducts are preferred because they’re more durable, resist lint accumulation better, and last longer than flexible alternatives. The vent path should be as short and straight as possible—every 90-degree turn adds resistance and reduces drying efficiency. Ideally, the vent should be no longer than 25 feet; each 45-degree bend adds approximately 5 feet of equivalent length to your calculation.
The vent termination point must extend beyond your home’s exterior wall or roof. Install a vent hood with a damper that opens when the dryer operates and closes when it’s off, preventing outdoor air from entering and energy from escaping. Ensure the vent hood opening is at least 12 inches from the ground, windows, doors, or air intake vents to prevent moisture and lint from affecting air quality or re-entering your home’s ventilation system.
Connect the dryer to the vent system using appropriate metal connectors or rigid ducting. Never use flexible vinyl ducting, which can trap lint, degrade over time, and presents a fire hazard. Secure all vent connections with metal hose clamps or duct tape rated for high-temperature applications. The vent connection at the dryer should be tight to prevent lint from escaping into wall cavities.
Inspect your vent system annually and clean it thoroughly at least once per year, or more frequently if you notice reduced drying performance. Lint accumulation in the vent is a leading cause of dryer fires and reduced efficiency. When combined with proper sustainable energy solutions practices, a well-maintained gas dryer vent system optimizes both safety and performance.
Testing and Inspection Procedures
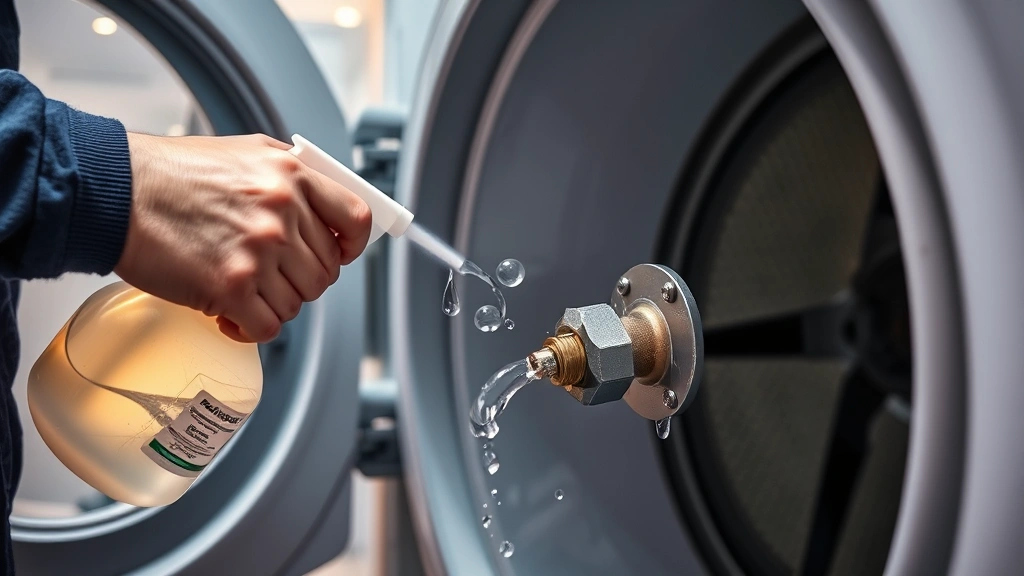
After completing all connections, thorough testing is essential before operating the dryer. Begin with a pressure test to detect any gas leaks. Prepare a solution of soapy water (mix dish soap with water in a spray bottle). Turn the gas supply back on slowly and carefully. Spray the soapy solution on every connection point—the gas inlet fitting, the flexible connector at both ends, and any other joints in the gas line.
Watch carefully for bubbles forming in the soapy solution. Any bubbling indicates a gas leak at that connection point. If you detect leaks, immediately turn off the gas supply and tighten the connection slightly. Retest after each adjustment. If tightening doesn’t stop the leak, disconnect and reconnect the fitting, reapplying pipe tape if necessary. If leaks persist after your attempts, stop and call a licensed professional—do not attempt further repairs.
Once you’ve confirmed no gas leaks, test the electrical connection. Ensure the dryer is properly grounded and the outlet provides adequate power. Plug the dryer in and check that the control panel lights up and responds to input. This confirms the ignition system has power.
Before running a full drying cycle, perform a short test run of 5-10 minutes. Listen for unusual sounds, smell for any gas odors (natural gas has a distinctive rotten egg smell added for safety), and observe the dryer’s operation. The burner should ignite smoothly, the drum should rotate properly, and the vent should expel warm, moist air. If anything seems amiss, stop the dryer immediately and investigate.
Most jurisdictions require a final inspection by a certified inspector or building official before you can legally operate the dryer. This inspection ensures compliance with local codes and safety standards. Schedule this inspection before completing your installation work, as inspectors may need to observe connections or test systems themselves. Some areas require inspections even for replacement appliances, so check your local requirements.
Maintenance and Ongoing Safety Checks
Proper maintenance extends your dryer’s lifespan and ensures continued safe operation. Monthly, visually inspect the gas connection and vent termination. Look for any signs of corrosion, damage, or deterioration. Check that the vent damper moves freely and closes completely when the dryer is off.
Clean the lint trap after every load—this is your most important maintenance task. A clogged lint trap reduces efficiency and increases fire risk. Additionally, vacuum or brush the lint filter monthly to remove trapped fibers that resist normal cleaning. Every 6-12 months, depending on usage, disconnect the vent duct at the dryer and use a vent brush or vacuum to remove lint buildup inside the ductwork.
Install a carbon monoxide detector in your laundry room or nearby area. This silent gas can accumulate if your dryer’s vent system is blocked or if combustion isn’t complete. A functioning detector provides early warning of dangerous conditions. Test the detector monthly and replace batteries annually, or immediately if the device indicates low battery status.
Inspect the flexible gas connector annually for signs of wear, kinks, or damage. If you notice any deterioration, replace it immediately with a new connector of the appropriate type and length. Keep the area around your dryer clean and clear of lint, dust, and combustible materials. These materials can accumulate near the dryer and pose fire risks, especially if they contact the hot exterior of the appliance.
Consider your dryer as part of your broader home environmental footprint reduction strategy. While gas dryers are more efficient than electric models, you can further reduce consumption by air-drying clothes when weather permits, using shorter drying cycles, and ensuring your lint filter and vent system remain clean for optimal efficiency.
When to Call a Professional
Certain situations absolutely require professional assistance. If you detect gas leaks that tightening connections doesn’t resolve, stop immediately and call a licensed plumber or gas technician. Do not attempt to repair gas lines yourself if you’re not trained—gas leaks are serious safety hazards that demand professional expertise.
If your home’s gas supply line requires modifications, extensions, or permanent piping installations, hire a licensed professional. These modifications must comply with building codes and pressure requirements specific to your home’s gas system. Improper work on main gas lines can affect your entire home’s gas supply and safety.
If you’re uncomfortable with any aspect of the installation, lack the necessary tools, or feel uncertain about your abilities, hire a professional. The cost of professional installation is minimal compared to potential safety risks or damage from improper work. Many utility companies offer installation services or can recommend certified technicians. Your dryer manufacturer may also have a list of approved installers.
If your dryer shows signs of problems after installation—such as weak flame, unusual odors, reduced drying performance, or difficulty igniting—contact a professional immediately. These symptoms may indicate gas supply issues, venting problems, or safety concerns that require expert diagnosis and repair.
Visit the advantages of natural gas article to understand more about efficient gas appliance use, or explore environmental sustainability examples for broader household efficiency strategies. The SustainWise Hub Blog offers additional resources on home energy management and safety practices.
Frequently Asked Questions
Can I install a gas dryer myself, or do I need a professional?
This depends on your location’s building codes and your experience level. Some jurisdictions permit homeowner installations with proper permits and inspections, while others require licensed professionals. Always check local requirements first. Even where homeowner installation is legal, if you lack confidence in your abilities or encounter unexpected complications, hiring a professional is the safest choice.
What type of gas connector should I use for my dryer?
Use a flexible stainless steel connector rated for natural gas or propane (depending on your fuel source). These connectors are affordable, readily available, and easy to install. Never reuse old connectors or use vinyl hose. The connector should be appropriately sized for your dryer’s gas inlet fitting and have NPT threads on both ends.
How do I know if my gas dryer has a leak?
Use the soapy water test: spray a solution of dish soap and water on all connections. Bubbles indicate escaping gas. You might also smell natural gas, which has a distinctive rotten egg odor added for safety. If you suspect a leak and can’t locate it with the soapy water method, call a professional immediately. Never ignore potential gas leaks.
How often should I clean my dryer’s vent system?
Clean the lint trap after every load. Brush or vacuum the filter monthly. Disconnect and clean the entire vent duct at least annually, or more frequently if you notice reduced drying performance. Lint accumulation is a major fire hazard and efficiency killer, so regular cleaning is essential.
What should I do if I smell gas near my dryer?
Do not ignore gas smells. Immediately turn off the gas supply at the main shutoff valve. Do not use electrical switches, create sparks, or light matches near the area. Leave your home and call your gas company’s emergency line or a licensed professional. Only return indoors after a professional has inspected and cleared the system.
Is it safe to vent my dryer indoors?
No. Indoor venting releases moisture into your home, which can cause mold growth, structural damage, and poor indoor air quality. It also releases any combustion byproducts indoors. Building codes prohibit indoor venting for these reasons. Always vent your dryer to the outdoors through a properly installed duct system.
Can I use a flexible vinyl vent hose for my dryer?
No. Vinyl hose traps lint, degrades with heat, and presents a significant fire hazard. Use rigid metal ducts or flexible metal connectors instead. Metal ducting is more durable, resists lint accumulation better, and is safer for long-term use.