Stringing a Gas Weed Eater: Pro Tips for Proper Maintenance and Eco-Conscious Yard Care
Maintaining your gas-powered weed eater is essential for keeping your lawn edges sharp and your yard looking pristine. However, many homeowners struggle with the seemingly simple task of stringing their gas line weed eater. Whether you’re replacing worn-out string or installing it for the first time, understanding the correct procedure will save you time, frustration, and money on professional repairs. This comprehensive guide walks you through every step of the process, offering pro tips that will make the job easier and more efficient.
Beyond just learning how to string your equipment, it’s worth considering the broader environmental impact of gas-powered lawn care. While gas weed eaters remain popular, exploring alternatives like electric models can significantly reduce your environmental footprint. However, if you’re committed to maintaining your current gas-powered equipment, proper maintenance ensures it runs efficiently and lasts longer, which is itself a form of sustainability.
Understanding Your Gas Weed Eater Components
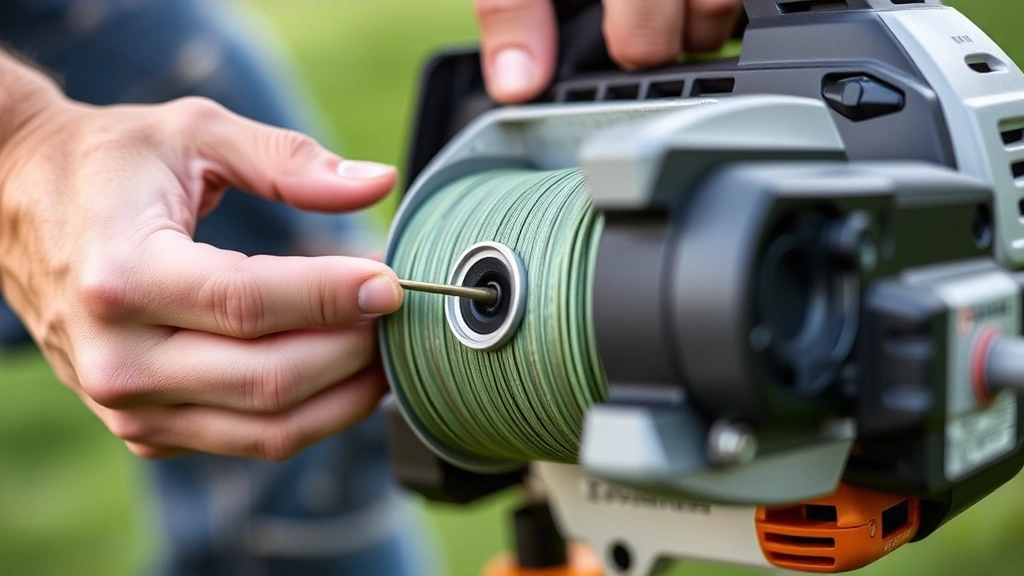
Before you begin the stringing process, it’s crucial to familiarize yourself with the key components of your gas weed eater. The cutting head, also called the trimmer head or spool, is where the string attaches and where most of the action happens. Inside this head sits the spool, a cylindrical component that holds and releases the string as needed. The bump head is a specific type of spool that advances string automatically when you tap it against the ground, while fixed-line spools require manual advancement.
The string itself, technically called trimmer line or cutting line, comes in various thicknesses measured in thousandths of an inch. Most residential gas weed eaters use .080-inch to .105-inch diameter string, though you should check your owner’s manual for the specific requirement for your model. Understanding whether your weed eater uses a bump head, fixed spool, or automatic feed system will determine the exact stringing procedure you’ll follow.
The engine housing and fuel tank are separate from the cutting head assembly, and you’ll want to ensure the engine is completely cool and the fuel valve is off before you begin any maintenance work. Safety should always be your first priority when working with gas-powered equipment. Taking time to understand your specific model’s design will make the stringing process much smoother and safer.
Gathering the Right Tools and Materials
Having the correct tools and materials before you start will make the job significantly easier and prevent frustration mid-project. First and foremost, you’ll need replacement trimmer line appropriate for your specific weed eater model. Purchase slightly more than you think you’ll need, as it’s better to have excess than to run short during the stringing process. Check your owner’s manual for the exact diameter and length specifications.
Essential tools include a flathead screwdriver or specialized trimmer head removal tool, depending on your model. Many newer gas weed eaters have quick-release mechanisms, while older models may require screwdrivers to remove the spool cover. A pair of work gloves will protect your hands from cuts and sharp edges on the trimmer head. You may also want to have a clean cloth nearby to wipe away any debris or old string fragments from the spool.
A measuring tape or ruler is helpful for ensuring you cut the string to the correct length, and a small container or bag can keep loose string organized during the process. Some people find it helpful to have a diagram or photo of their specific trimmer head model available on their phone for reference. Finally, ensure your work area is clean, dry, and well-lit so you can see exactly what you’re doing as you manipulate the small components.

Step-by-Step Stringing Process
The exact procedure for stringing your gas weed eater depends on your specific trimmer head design, but the fundamental principles remain consistent across most models. Start by ensuring the engine is completely cool and the fuel valve is turned off. Disconnect the spark plug wire to prevent accidental engine startup—this is a critical safety step that should never be skipped.
Next, locate the trimmer head on the end of the shaft. Most gas weed eaters have a cap or cover that holds the spool in place. If your model uses a quick-release mechanism, press or twist the release button and carefully separate the cover from the spool. If it uses screws, use your flathead screwdriver to carefully remove them, keeping track of where each one goes.
Once the cover is removed, examine the spool carefully. You’ll typically see two eyelets or holes on opposite sides where the string attaches. For most models, you’ll need to cut two pieces of trimmer line, each approximately 15-20 feet long, though consult your manual for the exact length. The specific length ensures you have enough string to fill the spool properly while leaving adequate cutting length.
Insert one end of the first string piece into one of the eyelets from the inside of the spool. Wind the string tightly and evenly around the spool in the direction indicated by an arrow on the spool itself—this directional arrow is crucial because winding in the wrong direction will cause problems. Keep tension on the string as you wind to ensure tight, even coils with no overlapping or loose sections.
Continue winding until you reach the end of the first section, then insert that end into the eyelet to secure it. Repeat the process with the second string piece on the other eyelet, winding in the same direction as indicated by the arrow. Make sure both sides of the spool are wound evenly and securely, as uneven winding can cause the string to tangle or not feed properly.

Once both sections are wound securely, carefully position the spool back into the trimmer head housing. Align the eyelets with the corresponding holes in the cover, then reattach the cover using either the quick-release mechanism or by replacing and tightening the screws. Ensure everything is snug but not over-tightened, as this can damage the plastic components.
Finally, pull both string ends through the eyelets until they extend from the trimmer head by approximately 4-5 inches. This extension length is important because it provides adequate cutting length while preventing the string from unraveling during operation. Some models have a string trimmer or cutter built into the guard; if yours does, use it to cut the string to the proper length for safe and efficient operation.
Pro Tips for Success
One of the most valuable pro tips is to take photos or video of your trimmer head before disassembly. This visual reference helps you remember exactly how everything fits together, which is especially helpful if you haven’t worked on your weed eater in a while. Many people find themselves confused during reassembly, and having a clear reference photo prevents mistakes.
Another pro tip involves the winding technique itself. Rather than winding the string haphazardly, divide the spool into two halves mentally and wind each half separately. This ensures even distribution and prevents the string from bunching up in one area. Some professionals recommend winding the string in a figure-eight pattern on larger spools, though most residential models work fine with simple circular winding.
When selecting replacement string, don’t automatically assume cheaper is better. Higher-quality trimmer line lasts longer, resists breakage better, and cuts more efficiently. Investing in quality string actually saves money over time because you won’t need to restring as frequently. Additionally, consider the material composition—some newer lines are designed to be more environmentally friendly than traditional nylon, aligning with the broader definition of sustainability and responsible resource use.
Keep a small notebook or digital record of when you last strung your weed eater and what string size you used. This documentation helps you remember specifications when you need replacements and allows you to track how often you’re performing maintenance. Consistent maintenance records can also help you identify if your equipment is deteriorating and might need replacement or upgrade.
A pro tip that many overlook involves pre-soaking your new trimmer line in water for a few hours before installation. This softens the plastic slightly, making it easier to wind smoothly and reducing the likelihood of kinks or breaks during the process. The line will return to its normal rigidity once it dries.
Troubleshooting Common Problems
If your weed eater won’t feed string properly after you’ve restrung it, the most common cause is incorrect winding direction. Check the arrow on your spool and verify you wound in the correct direction. String wound backwards will jam or not advance at all. Another common issue is over-winding the spool, which causes the string to bulge and prevent the cover from fitting properly. If the cover won’t close smoothly, you’ve likely wound too much string.
String breaking frequently during use often indicates that you wound it too loosely or didn’t maintain proper tension while winding. Additionally, using string that’s too thin for your specific model can result in constant breakage. Always verify that you’re using the correct diameter string for your trimmer head.
If the string doesn’t advance from the bump head even after tapping, the issue might be that the string wasn’t properly seated in the eyelets or that you didn’t pull enough length through after reassembly. Remove the cover and check that both string sections are fully inserted into their respective eyelets. Sometimes the issue is simply that the string needs to be pulled through further to have adequate length.
When the trimmer head wobbles or feels loose after reassembly, you likely didn’t tighten the cover sufficiently or didn’t align it properly with the housing. Carefully remove the cover again and check all alignment points before retightening. Be careful not to cross-thread any screws, as this can strip the plastic and create permanent damage.
If you notice string leaking or unwinding from the sides of the spool, the problem is usually that the string wasn’t wound tightly enough or wasn’t properly seated in the eyelets. Rewind using more tension and ensure each coil sits snugly against the previous one without gaps.
Maintenance Best Practices
Proper maintenance of your gas weed eater extends its lifespan significantly and ensures it runs efficiently. Beyond just stringing, regular maintenance includes checking and replacing the air filter, inspecting the spark plug, and using fresh fuel mixed with the correct oil ratio for your specific engine. Following the manufacturer’s maintenance schedule prevents costly repairs and keeps your equipment performing optimally.
Store your gas weed eater in a dry location during off-season months. If you won’t be using it for extended periods, consider running it until the fuel tank is empty to prevent fuel degradation inside the engine. Some experts recommend using fuel stabilizer if you’ll be storing the equipment for more than a month, which prevents varnish buildup and carburetor issues.
Inspect your trimmer head regularly for damage, cracks, or wear. If the housing is cracked or the eyelets are damaged, replacement is usually more cost-effective than repair. Check the string regularly during the season and restring before it becomes completely worn out, as waiting until it breaks completely can leave you without a functioning tool.
Consider exploring sustainable energy solutions for yard maintenance as an alternative to gas-powered equipment. Many homeowners are transitioning to electric or battery-powered alternatives that require less maintenance, produce zero emissions, and operate more quietly. If you do continue using gas equipment, proper maintenance ensures maximum efficiency and minimum environmental impact.
Cleaning your weed eater after each use prevents grass clippings and debris from accumulating and causing damage. Use a dry cloth to wipe down the exterior, and occasionally use compressed air to blow out debris from the engine cooling fins. This simple maintenance habit prevents overheating and keeps your equipment in better condition overall.
Keep your trimmer line properly stored in a cool, dry location. Exposure to sunlight and extreme temperatures can degrade the plastic, making it more brittle and prone to breaking. If you buy trimmer line in bulk, store it in an airtight container away from direct sunlight to extend its shelf life.
FAQ
How often should I restring my gas weed eater?
The frequency depends on how often you use your weed eater. Casual homeowners might restring every 2-3 months during the growing season, while frequent users might need to do it monthly or more. Most people find they need to restring before the string completely breaks, as waiting until it’s completely gone leaves you without a functioning tool. Keeping extra string on hand ensures you can restring whenever needed.
Can I use any trimmer line in my gas weed eater?
No, you should always use trimmer line that matches your owner’s manual specifications regarding diameter and length. Using incorrect line size can cause feeding problems, breakage, or even damage to your trimmer head. While line from different manufacturers is generally interchangeable as long as the diameter is correct, always verify compatibility with your specific model.
Why does my string keep breaking?
String breakage can result from several causes: using incorrect diameter string, winding too loosely, hitting hard objects during use, or using low-quality line. Ensure you’re using the correct string size for your model, wind with appropriate tension, and try to avoid striking rocks, sticks, or other debris. Upgrading to higher-quality trimmer line often solves chronic breakage issues.
What’s the difference between bump head and automatic feed?
A bump head requires you to tap the trimmer head against the ground to advance string as it wears. An automatic feed system advances string automatically during operation. Both systems work well; the choice depends on your preference and what your equipment came with. Bump heads are generally more affordable and simpler, while automatic feed is more convenient.
Is it worth switching to an electric weed eater?
This depends on your specific needs and environmental values. Electric weed eaters offer numerous advantages including lower maintenance, zero emissions, quieter operation, and lower operating costs. Check out our article on advantages of electric vehicles for broader context on electric alternatives. For yard maintenance, battery-powered models have become increasingly capable and affordable, making them viable for many homeowners.
Can I reuse old trimmer line?
It’s not recommended to reuse old trimmer line. Once it’s been used, it becomes brittle, develops kinks, and is more prone to breaking. Investing in fresh line ensures better performance and reliability. However, you can save scraps for other uses like securing items or temporary repairs in the yard.
How do I know if my trimmer head needs replacement?
Replace your trimmer head if you notice cracks, damage to the eyelets, or if the cover doesn’t fit snugly. If you’re frequently having feeding problems despite properly stringing the head, the internal mechanism might be worn. Replacement trimmer heads are relatively affordable and are worth replacing rather than struggling with a damaged head.