Eco-Friendly Weed Eater Tips: Expert Advice for Sustainable Lawn Care
Maintaining a beautiful lawn doesn’t require sacrificing environmental responsibility. Whether you’re using a gas-powered weed eater or transitioning to greener alternatives, understanding proper maintenance and eco-conscious practices can significantly reduce your carbon footprint while keeping your yard pristine. This comprehensive guide explores the best practices for operating and maintaining weed eaters sustainably, with special attention to proper fuel handling and equipment care.
The lawn care industry contributes meaningfully to residential emissions, with gas-powered equipment responsible for approximately 5% of U.S. air pollution. By learning the correct techniques for maintaining your tools and exploring green technology innovations transforming our future, you can make informed decisions about your yard maintenance approach. This guide will help you master essential skills while minimizing environmental impact.
Understanding Gas Weed Eater Basics
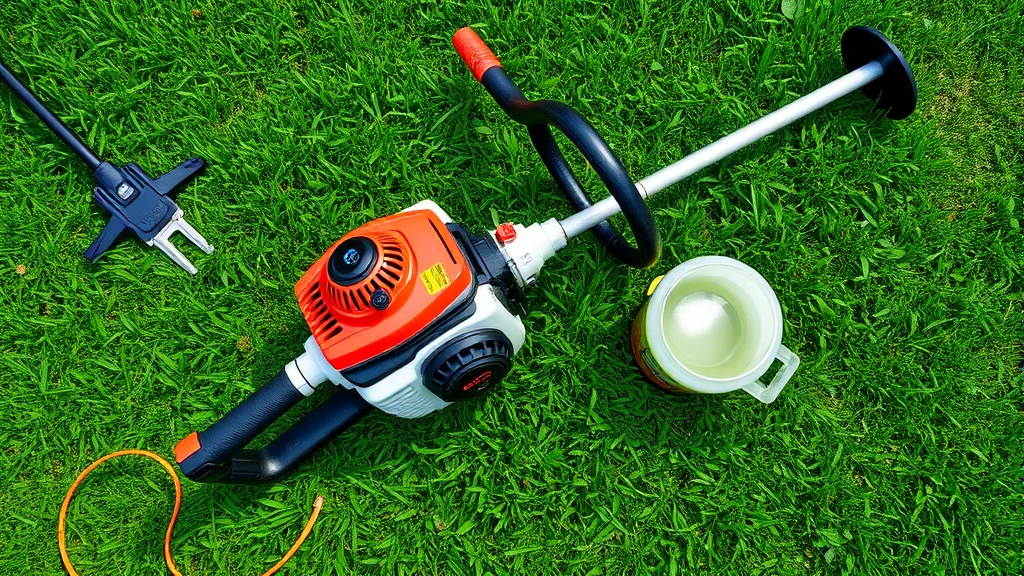
Gas-powered weed eaters remain popular tools for residential and commercial lawn maintenance, but they require proper understanding to operate efficiently. A typical gas weed eater consists of a two-stroke or four-stroke engine, a fuel tank, a cutting head with trimmer line, and various safety features. The trimmer line, also called string or cord, is the replaceable cutting element that rotates at high speeds to cut grass and weeds.
Before learning how to string your gas line weed eater, it’s important to understand the different head types available. Most residential models feature automatic or semi-automatic heads that feed line as needed, while professional-grade equipment might use manual feed systems. Understanding your specific model’s design will make the stringing process much simpler and ensure optimal cutting performance.
The environmental impact of gas weed eaters extends beyond emissions. Manufacturing, fuel production, and disposal all contribute to the overall lifecycle carbon footprint. By maximizing equipment lifespan through proper maintenance and exploring how to reduce your environmental footprint, you can make more sustainable choices in lawn care.
How to String Your Gas Line Weed Eater Properly
Properly stringing your gas weed eater is essential for efficient operation and safety. The process varies slightly depending on your equipment model, but the fundamental steps remain consistent across most residential weed eaters.
Step-by-Step Stringing Process
Preparation and Safety: Always disconnect the spark plug wire before beginning maintenance work on your weed eater. This prevents accidental engine startup and ensures your safety while handling the cutting head. Place the weed eater on a flat, stable surface where you have adequate workspace.
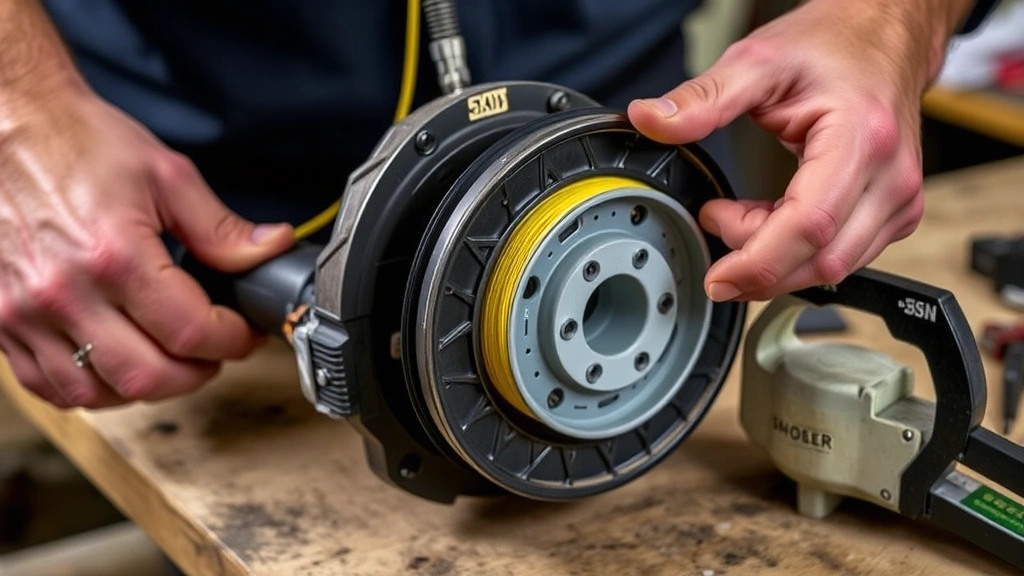
Accessing the Cutting Head: Most weed eaters feature a rotating cutting head at the bottom of the shaft. To access it, you’ll need to remove the head cover or spool housing. This typically involves unscrewing a central bolt or pressing release tabs, depending on your model. Consult your equipment’s manual for specific instructions, as designs vary significantly between manufacturers.
Removing Old Line: Carefully extract any remaining old trimmer line from the spool. Clean out debris, grass clippings, and dirt that may have accumulated inside the head housing. A clean spool ensures new line feeds properly and prevents jamming during operation.
Measuring and Cutting New Line: Trimmer line comes in various thicknesses (typically 0.080 to 0.155 inches). Check your manual for the correct diameter for your model. Most residential weed eaters require approximately 20-30 feet of line. Cut your line to the manufacturer’s recommended length, as using excessive line wastes material and reduces cutting efficiency.
Threading the Line: Locate the line guides or eyelets on your cutting head. These small openings guide the line outward as it rotates. Thread one end of your trimmer line through the appropriate guide, leaving several inches extending beyond the guide. This tail prevents the line from slipping back during operation.
Winding the Spool: Wind the trimmer line tightly and evenly around the spool in the direction indicated by arrows on your equipment (usually clockwise). Maintain consistent tension as you wind to ensure proper line feeding. Uneven winding causes jamming and requires frequent manual feeding during use.
Threading the Second Section: After winding the first section, thread the remaining line through the second guide eyelet. Wind this section in the same direction with equal tension. Ensure both sides of the spool are balanced to promote even line feeding.
Securing the Line: Most modern weed eaters feature small notches or grooves where you insert the line ends to hold them in place. Insert both trimmer line ends into these retention points. This prevents unwinding and keeps the line properly positioned when you reassemble the head.
Reassembly and Testing
Carefully reassemble the cutting head cover, ensuring all tabs align properly. Tighten the central bolt securely but avoid over-tightening, which can crack plastic components. Reconnect the spark plug wire and perform a test run in an open area away from people and structures. The line should feed smoothly and cut evenly.
If the line doesn’t feed properly, the spool may be wound too loosely or the line isn’t seated correctly in the retention grooves. Remove the head cover and adjust the winding tension or reposition the line ends. Proper line feeding is crucial for efficient operation and even cutting.
Fuel Management and Environmental Responsibility
Fuel selection and handling significantly impact both your weed eater’s performance and environmental footprint. Gas-powered equipment typically uses either regular unleaded gasoline with a two-stroke oil mix or straight gasoline in four-stroke engines.
Choosing the Right Fuel: Two-stroke engines require precise oil-to-gas ratios, typically 50:1 or 40:1 depending on your manufacturer’s specifications. Using the correct ratio prevents engine damage and reduces emissions. Always use high-quality two-stroke oil designed for small engines, as bargain oils contain additives that increase smoke and emissions.
Four-stroke weed eaters use straight gasoline and separate oil for lubrication, similar to car engines. These models produce fewer emissions than two-stroke engines and are increasingly popular among environmentally conscious consumers. If you’re considering sustainable energy solutions, upgrading to four-stroke equipment or electric alternatives represents meaningful progress.
Storage and Spillage Prevention: Improper fuel storage and handling causes significant environmental damage. Store gasoline in approved metal or plastic containers away from living spaces and direct sunlight. Never pour excess fuel down drains or onto soil, as it contaminates groundwater and harms ecosystems. Small spills should be absorbed with absorbent material and disposed of properly at hazardous waste facilities.
According to the EPA’s Small Engines Program, improper fuel handling and equipment maintenance account for significant pollution from lawn equipment. Implementing best practices dramatically reduces your environmental impact.
Seasonal Fuel Considerations: Gasoline degrades over time, especially during storage. Use fuel stabilizer when storing your weed eater for extended periods, or drain the fuel tank completely before winter. Stale fuel causes starting difficulties and increases emissions. During spring startup, use fresh fuel and allow the engine to warm up properly before operating at full throttle.
Maintenance Tips for Longevity
Regular maintenance extends your equipment’s lifespan, maintains efficiency, and reduces environmental impact. A well-maintained weed eater produces fewer emissions and requires fewer repairs or replacements.
Essential Maintenance Tasks
Air Filter Cleaning: The air filter prevents debris from entering the engine. Check it regularly and clean or replace it according to your manual’s recommendations. A clogged air filter forces the engine to work harder, consuming more fuel and producing excess emissions. Monthly inspection during heavy use season ensures optimal performance.
Spark Plug Inspection: Replace spark plugs annually or when starting becomes difficult. A fouled spark plug increases fuel consumption and emissions. Keep the correct replacement part on hand for quick maintenance.
Cooling System Care: Keep cooling fins and vents clear of grass clippings and debris. These components prevent engine overheating. After each use, gently brush away accumulated material before it hardens and restricts airflow.
Fuel System Maintenance: Inspect fuel lines for cracks or deterioration annually. Damaged fuel lines leak gasoline, creating safety hazards and environmental contamination. Replace cracked or brittle lines immediately. The fuel filter should also be replaced annually to prevent debris from clogging the carburetor.
Trimmer Line Inspection: Examine your trimmer line before each use. Worn or damaged line reduces cutting efficiency and requires more engine power. Replace line when it becomes thin, frayed, or discolored. This simple maintenance task significantly improves performance.
Transitioning to Eco-Friendly Alternatives
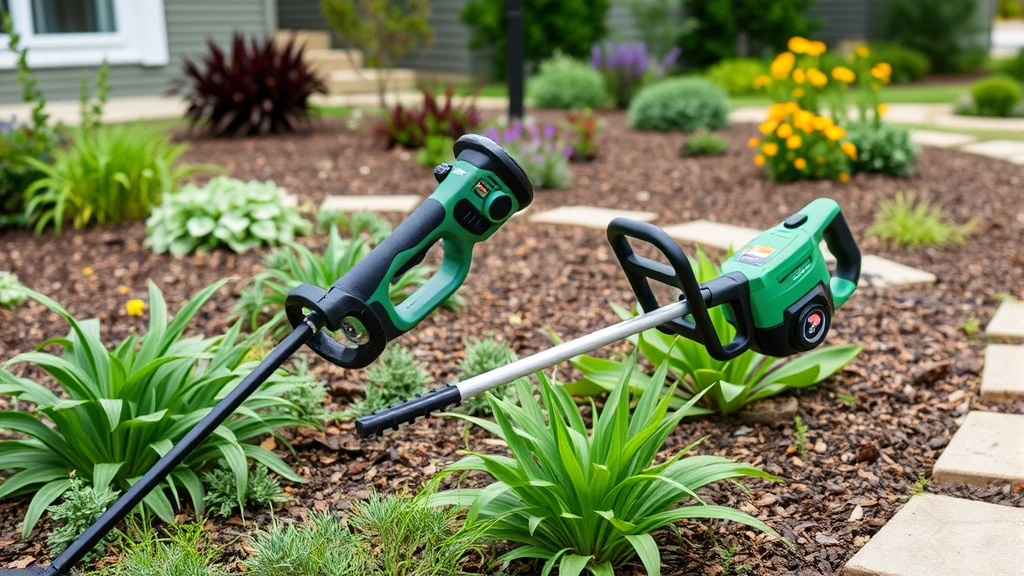
While gas weed eaters serve important purposes, exploring eco-friendly alternatives aligns with broader sustainability goals. Modern electric and battery-powered weed eaters offer compelling advantages for residential use.
Electric Corded Models: Plug-in electric weed eaters produce zero emissions during operation and require minimal maintenance. They’re quieter than gas models, reducing noise pollution in your neighborhood. The primary limitation is cord length, making them suitable for smaller properties or areas near power outlets. Operating costs are significantly lower than fuel-powered equipment.
Battery-Powered Options: Lithium-ion battery technology has advanced dramatically, providing runtime sufficient for most residential lawn care. Battery weed eaters eliminate emissions, require no fuel mixing, and operate quietly. Many manufacturers offer interchangeable batteries across their product lines, increasing value and convenience. Initial investment is higher than gas models, but lower operating and maintenance costs provide long-term savings.
Manual Alternatives: For small areas or environmentally committed users, manual scythes and hand-operated string trimmers provide zero-emission options. These tools require physical effort but produce no pollution, noise, or fuel waste. They’re ideal for small yards or as supplementary tools for detailed edging.
Exploring comprehensive resources on sustainable lawn care practices helps you evaluate options matching your property size and environmental priorities.
Reducing Your Lawn Care Carbon Footprint
Beyond equipment selection, numerous practices minimize environmental impact from lawn maintenance. Comprehensive approaches address multiple aspects of yard care.
Mowing Frequency and Technique: Allowing grass to grow slightly longer (3-4 inches) before trimming reduces mowing frequency and equipment use. Taller grass also improves lawn health and reduces water needs. When using weed eaters, trim edges efficiently without excessive passes over the same area, which wastes fuel and causes unnecessary wear.
Mulching and Composting: Rather than bagging grass clippings and yard waste, leave clippings on your lawn where they decompose and return nutrients to soil. This eliminates waste transportation while improving soil health. Composting larger yard debris creates nutrient-rich material for gardens and landscaping.
Reducing Overall Lawn Area: Consider converting portions of your lawn to native plantings, vegetable gardens, or hardscaping. This dramatically reduces equipment needs and maintenance time while increasing habitat value and property appeal. Native plants require less water, fertilizer, and maintenance than traditional lawns.
Water Conservation: Efficient irrigation systems and proper watering schedules reduce water consumption while supporting healthy grass growth. Overwatered lawns require more frequent mowing and support excessive weed growth, increasing equipment use and maintenance demands.
Integrated Pest Management: Rather than relying solely on weed eaters and chemical herbicides, implement integrated approaches combining mechanical removal, mulching, and selective herbicide use. This reduces chemical inputs and equipment dependency while supporting beneficial insects and soil organisms.
Understanding the broader context of energy choices and their environmental implications helps inform decisions about all aspects of home maintenance, including lawn care equipment selection.
For comprehensive information on equipment regulations and emissions standards, the EPA’s Small Engine Regulations provide authoritative guidance on compliant equipment and best practices.
FAQ
How often should I replace my weed eater trimmer line?
Trimmer line should be replaced when it becomes thin, frayed, discolored, or breaks frequently. For regular residential use, expect to replace line 2-4 times per season. Heavier use or tougher vegetation requires more frequent replacement. Always keep spare line on hand for convenient mid-season changes.
What’s the difference between 40:1 and 50:1 oil-to-gas ratios?
These ratios indicate how much two-stroke oil to mix with gasoline. A 50:1 ratio uses less oil than 40:1, producing less smoke and emissions. Always follow your manufacturer’s specific recommendation, as incorrect ratios damage engines and increase pollution. Using the wrong ratio voids warranties and causes expensive repairs.
Can I use regular motor oil in my two-stroke weed eater?
No. Two-stroke engines require specialized two-stroke oil formulated to burn cleanly and provide proper lubrication. Regular motor oil contains additives that create excessive smoke, carbon buildup, and engine damage. Always use oil specifically labeled for two-stroke small engines.
How long can I store gasoline for my weed eater?
Untreated gasoline degrades within 2-3 months, especially in warm conditions. For longer storage, add fuel stabilizer according to product directions, which extends usability to 6-12 months. For seasonal equipment, drain the fuel tank completely before winter storage to prevent gum formation in the carburetor.
Is it better to use ethanol-free gasoline in my weed eater?
Ethanol-free gasoline is preferable for small engines. Ethanol attracts moisture, which corrodes fuel system components and causes starting difficulties. Ethanol also separates from gasoline during storage, leaving varnish deposits in carburetors. While ethanol-free gas costs slightly more, it improves engine reliability and longevity.
What environmental certifications should I look for in new weed eaters?
Look for equipment meeting EPA Tier 4 Final emissions standards, which represent the strictest small engine pollution regulations. The Carbon Trust and similar organizations provide certification information. Many manufacturers now highlight compliance with strict emissions standards as a key selling point.
How do I know if my weed eater is running too rich or too lean?
Running rich (too much fuel) produces excessive smoke and fouled spark plugs. Running lean (too little fuel) causes overheating and loss of power. Proper mixture produces minimal visible smoke and consistent power output. Consult your manual for carburetor adjustment procedures, or have a professional technician make adjustments.