How to String Your Gas Line Weed Eater: Pro Tips for Optimal Performance
Maintaining your gas-powered weed eater is essential for keeping your yard looking pristine while ensuring the equipment operates efficiently. One of the most common maintenance tasks you’ll encounter is stringing or restringing your trimmer head. Whether you’re a seasoned gardener or tackling yard work for the first time, learning the proper way to string your gas line weed eater will save you time, money, and frustration. This comprehensive guide walks you through every step of the process, from understanding your trimmer’s design to troubleshooting common issues.
A well-maintained weed eater is not just about aesthetics—it’s about responsible equipment stewardship. By mastering this essential skill, you reduce unnecessary waste from broken equipment and extend the lifespan of your tools. This aligns with broader environmental sustainability practices, as maintaining tools properly reduces the need for frequent replacements and the associated manufacturing waste. Let’s dive into the details of keeping your trimmer in top condition.
Understanding Your Gas Weed Eater Trimmer Head
Before you begin the stringing process, it’s crucial to understand the anatomy of your trimmer head. Most gas-powered weed eaters feature a cylindrical or round head that houses the cutting string, also called trimmer line or weed whacker string. The head typically contains a spool—a rotating mechanism that holds the string—and a cover or housing that protects the internal components.
The trimmer head works by spinning the string at high speeds, creating a cutting edge capable of slicing through grass, weeds, and light brush. As the string wears down from use, you’ll need to feed out fresh line from the spool or completely restring the head when the spool is empty. Understanding this mechanism helps you appreciate why proper stringing is essential for safe, effective operation.
Most modern gas weed eaters use one of two stringing systems: the automatic feed system or the manual bump feed system. Automatic systems feed string as needed during operation, while bump feed systems require you to tap the head against the ground to release more string. Knowing which system your trimmer uses will influence your approach to stringing.

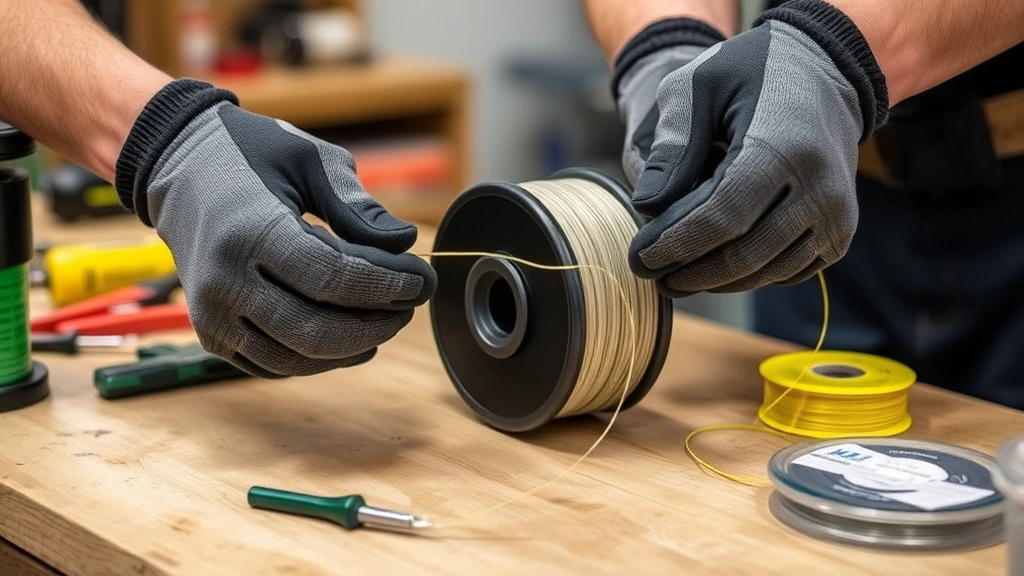
Tools and Materials You’ll Need
Gathering the right tools before you start makes the job significantly easier and more efficient. Here’s what you should have on hand:
- Replacement trimmer line: Purchase line that matches your trimmer’s specifications. Common sizes include 0.080, 0.095, and 0.105 inches in diameter. Check your manual for the correct size.
- Trimmer head removal tool or wrench: Some trimmers require specific tools to remove the head; others use standard wrenches.
- Needle-nose pliers: Useful for manipulating the line and securing it in the spool.
- Scissors or line cutter: For trimming the string to the correct length.
- Work gloves: Protect your hands from sharp edges.
- Safety glasses: Protect your eyes from flying debris.
- Your trimmer’s manual: Always reference the manufacturer’s instructions for your specific model.
Having these items prepared ensures you won’t need to interrupt your work to search for missing tools. Organization is key to a smooth maintenance experience.
Step-by-Step Stringing Instructions
Now that you’re prepared, let’s walk through the actual process of stringing your gas weed eater. Follow these steps carefully for the best results:
Step 1: Safety First Before touching any part of your trimmer, ensure the engine is completely off and cool. Remove the spark plug wire to prevent accidental starting. This is non-negotiable for your safety.
Step 2: Remove the Trimmer Head Locate the fastener holding the trimmer head to the shaft. This is typically a bolt or nut. Use the appropriate wrench or tool to loosen and remove it. Some models feature a reverse-threaded fastener, so turn clockwise if counterclockwise doesn’t work. Carefully remove the head and set aside all small parts in a safe location.
Step 3: Examine the Spool Once the head is removed, inspect the spool for damage, cracks, or worn areas. If the spool is damaged, you may need to replace it rather than simply restring. Clean any debris from the spool before proceeding.
Step 4: Prepare Your Trimmer Line Cut a length of replacement line according to your manual’s specifications—typically between 20 to 30 feet. Some people prefer to measure by placing the line around the spool; others use the manual as a guide. Having the correct length prevents overfilling and ensures proper function.
Step 5: Insert the Line into the Spool Locate the small hole or slot on the spool where the line begins. This is usually near the center. Insert approximately 6 inches of one end of the trimmer line into this hole. You may need to use needle-nose pliers to guide it. Ensure the line is firmly seated in the slot.
Step 6: Wind the Line Onto the Spool Now comes the critical part—winding the line evenly onto the spool. Rotate the spool in the direction indicated by the arrow or marking on the spool itself. Wind the line tightly and evenly, keeping tension consistent throughout. Avoid overlapping the line or creating lumps, as this can cause feeding problems. Most spools require two to three complete rotations of line.
Step 7: Leave the Exit Line As you near the end of the line, stop winding and leave approximately 6 inches of line unwound. This remaining line will feed through the exit holes in the trimmer head housing to become your cutting strings.
Step 8: Secure the Line Most spools feature small notches or slots near the outer edge where you secure the end of the line. Insert the 6-inch tail into this notch to hold it in place during reassembly. Use needle-nose pliers if needed to ensure it’s firmly seated.
Step 9: Reassemble the Trimmer Head Place the spool back into the trimmer head housing, ensuring it’s seated correctly. Feed the two exit lines through the appropriate holes in the head cover. These holes are usually positioned opposite each other to create balanced cutting. Screw the trimmer head back onto the shaft, tightening securely but not excessively.
Step 10: Trim the Cutting Lines Once the head is reassembled, trim each exit line to the appropriate cutting length. Most trimmers use a cutting length of 4 to 6 inches per side. Consult your manual for the exact specification. Uneven cutting lines will create an imbalanced trimmer head and poor cutting performance.
Different Trimmer Head Types
Understanding that different trimmer models use different head designs helps you adapt these instructions to your specific equipment. The most common types include bump feed heads, automatic feed heads, and fixed line heads.
Bump Feed Heads These traditional designs require you to tap the trimmer head against the ground to release more line as it wears down. The internal mechanism uses centrifugal force to advance the line incrementally. When restringing, you’ll wind the line as described above, leaving the exit lines at appropriate lengths.
Automatic Feed Heads These newer designs automatically advance the line during operation without requiring manual bumping. They often feature a spring-loaded mechanism that feeds line continuously. The stringing process is similar, but you may need to ensure the spring mechanism is properly positioned during reassembly.
Fixed Line Heads Some commercial-grade trimmers use fixed line designs where the string doesn’t advance at all. You manually trim the worn line to restore cutting length. These are less common on residential models but operate differently than bump or automatic systems.
Common Mistakes to Avoid
Learning from others’ mistakes helps you avoid frustration and potential damage to your equipment. Here are the most frequent errors people make when stringing gas weed eaters:
- Using incorrect line diameter: Installing line that’s too thick can cause the spool to jam or the engine to work too hard. Line that’s too thin breaks easily. Always verify the correct size for your model.
- Winding line in the wrong direction: Check the arrow on your spool carefully. Winding backward prevents proper line feeding and can damage the mechanism.
- Overfilling the spool: Packing too much line onto the spool causes jamming and feeding problems. Follow your manual’s length specifications.
- Neglecting to secure the exit lines: If the lines aren’t properly fed through the exit holes, they won’t cut evenly or may come loose during operation.
- Trimming cutting lines to unequal lengths: Unbalanced cutting lines reduce efficiency and can vibrate excessively during use.
- Forgetting to disconnect the spark plug: This is a safety hazard that could result in serious injury. Always disconnect before maintenance.
- Reusing old, frayed line: Always use fresh trimmer line. Old or damaged line breaks easily and reduces cutting performance.
Maintenance Tips for Longevity
Proper stringing is just one aspect of maintaining your gas weed eater. These additional maintenance practices extend the life of your equipment and ensure reliable performance:
Regular Line Inspection Check your trimmer line before each use. Replace it immediately if you notice fraying, cracks, or significant wear. Worn line reduces cutting efficiency and breaks more easily during operation, potentially damaging the trimmer head.
Clean the Trimmer Head After each use, remove grass clippings and debris from the trimmer head. A buildup of material can affect line feeding and create imbalance during rotation. Use a soft brush or compressed air for cleaning.
Store Properly When not in use, store your trimmer in a cool, dry location. Protect it from extreme temperatures and moisture, which can damage internal components and degrade the fuel system. Store extra trimmer line in its original packaging to maintain quality.
Seasonal Maintenance At the beginning of each season, inspect the entire trimmer, including the fuel filter, spark plug, and air filter. Replace these consumable parts as recommended in your manual. Proper seasonal preparation prevents starting issues and ensures optimal performance throughout the year.
Fuel Management Use fresh gasoline mixed with the correct ratio of oil for your two-stroke engine. Old fuel can gum up the fuel system and cause starting problems. If you store your trimmer for extended periods, drain the fuel tank or add a fuel stabilizer to prevent degradation.
When to Consider Eco-Friendly Alternatives
While maintaining your gas weed eater properly is important, it’s worth considering the environmental impact of gas-powered equipment. As you develop your maintenance skills with your current trimmer, you might explore more sustainable alternatives for future purchases.
Gas-powered weed eaters emit greenhouse gases and contribute to air pollution. They also require ongoing fuel consumption and generate noise pollution. If you’re interested in sustainable energy solutions, you might investigate battery-powered or corded electric trimmers for smaller properties. These alternatives produce zero emissions during operation and significantly reduce your carbon footprint.
For those with larger properties, hybrid approaches work well—using gas-powered equipment for heavy-duty work while relying on electric options for regular maintenance. This balanced strategy reduces environmental impact while maintaining the capability to handle demanding tasks. Explore advantages of electric equipment to understand how battery technology has advanced in yard care tools.
If you’re committed to reducing your overall environmental footprint, learning to properly maintain your current equipment extends its usable life and delays the need for replacement—a key principle of reducing your environmental footprint. Quality maintenance is itself a sustainable practice.
For more information on emissions standards and environmental regulations for outdoor power equipment, consult the EPA’s Small Engines and Equipment page, which provides comprehensive guidelines on equipment efficiency and emissions reduction.
Additionally, the Professional Landcare Network offers resources on sustainable landscape maintenance practices that balance equipment performance with environmental responsibility.
FAQ
How often should I restring my gas weed eater?
The frequency depends on usage. Light residential use might require restringing every few months, while heavy use could necessitate restringing weekly or multiple times per week. You’ll restring when the spool is completely empty or when you notice significantly reduced cutting performance.
Can I use any trimmer line size in my weed eater?
No, always use the line size specified in your trimmer’s manual. Using incorrect sizes can damage the spool mechanism, reduce cutting efficiency, or cause the engine to work excessively hard. Common sizes are 0.080, 0.095, and 0.105 inches.
What’s the best way to store extra trimmer line?
Store trimmer line in its original packaging or in a cool, dry place away from direct sunlight. Proper storage prevents the line from becoming brittle or degraded. Keep it away from extreme heat or cold, which can affect its performance and lifespan.
Why does my trimmer head keep jamming?
Jamming usually results from overfilling the spool, winding the line in the wrong direction, or using incorrect line diameter. Review your manual’s specifications and ensure you’re following the correct winding direction indicated by the arrow on the spool.
How tight should I wind the line on the spool?
Wind the line with consistent, moderate tension—tight enough to keep it from slipping but not so tight that you’re straining to turn the spool. The line should lay evenly without gaps or overlaps. Finding the right balance takes practice but becomes intuitive with experience.
What should I do if the trimmer line keeps breaking?
Frequent breakage often indicates you’re using old or damaged line, incorrect line diameter, or hitting obstacles like rocks or concrete. Always use fresh line of the correct size, and avoid cutting hard objects. If problems persist, have your trimmer head inspected by a professional.
Can I reuse old trimmer line?
It’s not recommended. Old line becomes brittle, frays easily, and loses cutting efficiency. Always use fresh line for optimal performance and safety. Reusing old line often leads to breakage and frustration.
How do I know which direction to wind the line?
Check for an arrow or directional marking on the spool itself. This arrow indicates the correct winding direction. If you can’t find a marking, consult your trimmer’s manual. Winding in the wrong direction prevents proper line feeding.