Gas Mask Drawing Tips: A Comprehensive Artist’s Guide
Drawing a gas mask presents a fascinating challenge for artists exploring industrial, dystopian, or realistic subject matter. Whether you’re creating concept art for a post-apocalyptic narrative, designing character illustrations, or simply expanding your technical drawing skills, mastering gas mask anatomy and perspective is essential. This protective equipment combines complex geometric forms with organic curves, making it an excellent study in form, function, and artistic representation.
Gas masks have become iconic symbols in contemporary art and design, appearing in everything from graphic novels to fine art installations. Understanding how to render them convincingly requires knowledge of their mechanical components, material properties, and three-dimensional structure. This guide will walk you through essential techniques, from basic construction to advanced shading methods, enabling you to draw gas masks with confidence and authenticity.
Understanding Gas Mask Anatomy
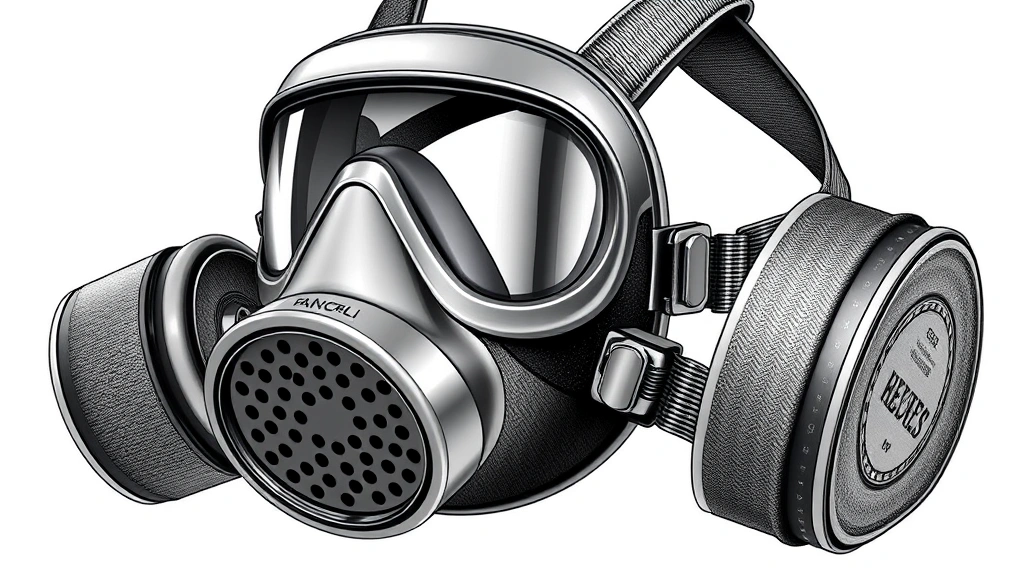
Before putting pencil to paper, familiarize yourself with the essential components that comprise a functional gas mask. The facepiece forms the central housing that covers the nose and mouth area, typically featuring a transparent or semi-transparent viewport for vision. This is often made from silicone or rubber, giving it a slightly elastic appearance in your drawings.
The exhalation valve sits below the viewport, allowing exhaled air to escape while preventing contaminants from entering. This small but crucial detail adds realism to your illustrations. The filter cartridges attach to the sides or front of the mask, appearing as cylindrical protrusions. Understanding these mechanical elements helps you convey the mask’s purpose and authenticity.
The head harness consists of multiple straps that secure the mask to the wearer’s head. These straps create interesting line work and shadow opportunities in your drawings. The voicemitter, located on the front, allows communication while wearing the mask. Study actual gas masks or reference photographs to understand how these components interact and overlap.
Different mask types—such as half-masks, full-face respirators, or specialized chemical protection equipment—have varying anatomical features. Researching specific mask models will enhance your accuracy and allow you to create diverse mask designs. Consider exploring resources from organizations like the Occupational Safety and Health Administration for technical specifications and reference materials.
Basic Construction and Proportions
Start your gas mask drawing with a simplified geometric foundation. Begin by sketching a basic sphere or oval for the main facepiece, which will serve as your primary volume. This foundational shape helps you establish the correct proportions and ensures symmetry. Most gas masks feature a width-to-height ratio of approximately 1:1.2, meaning they’re slightly taller than they are wide.
Next, establish the center line running vertically down the middle of your drawing. This crucial guideline ensures both sides of the mask remain proportionally balanced. Add a horizontal line approximately one-third down from the top to indicate where the viewport begins. The viewport typically occupies the upper two-thirds of the facepiece, while the lower section houses the exhalation valve and filter attachments.
The filter cartridges should be positioned at roughly 45-degree angles from the central axis. Their length typically extends outward a distance equal to about one-third of the mask’s width. Sketch these as cylinders in perspective, paying attention to how they foreshorten based on your viewing angle. The straps of the head harness should converge toward the back of the skull, creating an impression of depth and three-dimensionality.
For proportional accuracy, divide the mask’s height into four equal sections. The viewport occupies the top two sections, while the breathing area and filter attachment zones occupy the lower two sections. This division system helps maintain consistent artistic standards throughout your work, similar to how professionals maintain consistency in their creative practices.
When drawing the breathing apparatus intake, ensure the openings are appropriately sized relative to the filter cartridges. A common mistake is making these openings too small, which breaks the visual logic of the design. The intake diameter should be roughly one-quarter to one-third of the cartridge length.
Perspective and Angle Variations
Mastering multiple perspectives elevates your gas mask drawings from basic illustrations to professional-quality artwork. The frontal view presents the most straightforward approach, emphasizing symmetry and the mask’s protective nature. When drawing straight-on, ensure perfect vertical alignment of all elements along your center line.
The three-quarter view offers more visual interest and dimensionality. Tilt your center line slightly, using perspective principles to show how the far side of the mask recedes. The filter cartridge on the near side appears larger and more detailed, while the far cartridge diminishes in size. The head harness straps should show clear overlapping and depth relationships.
For profile views, pay special attention to the mask’s thickness and the spatial relationship between the facepiece and the filter attachments. In profile, you’ll see the side-mounted cartridges extending perpendicular to your viewing plane. The head harness becomes particularly important here, as it defines the mask’s silhouette and structural integrity.
When drawing extreme angles—such as looking up at the mask from below or down from above—use aggressive perspective foreshortening. The viewport shape distorts significantly, appearing narrower or wider depending on your vantage point. These challenging angles demonstrate advanced drawing skills and create dynamic, engaging compositions.
Consider the relationship between the mask wearer and your viewpoint. A mask viewed from above suggests the wearer is looking downward, creating a confrontational or commanding presence. Conversely, viewing from below implies the wearer towers above, evoking vulnerability or subordination. These psychological dimensions add narrative depth to your artwork.
Materials and Texture Rendering
Gas masks typically combine multiple materials, each with distinct visual properties that require different rendering techniques. The rubber or silicone facepiece exhibits a matte finish with subtle surface irregularities. To render this convincingly, use soft, diffused shading rather than sharp highlights. Include fine wrinkles and creases where the material naturally flexes around the mouth and cheeks.
The transparent viewport demands special attention, as it’s the focal point of most gas mask drawings. To create convincing glass or plastic, leave strategic areas of white paper untouched to represent light reflection. Add subtle internal reflections and slight distortion of any visible features behind the viewport. A thin highlight line along the viewport’s edge enhances its three-dimensional quality.
Metal components—including the filter cartridge casings, valve housings, and strap attachments—require reflective rendering techniques. Use darker values on one side and bright highlights on the opposing side to suggest metallic curvature. Metal typically shows sharper, more defined highlights compared to rubber components. Include small details like threaded connections where cartridges attach to the mask body.
The head harness straps are usually made from elastic fabric or plastic. Render these with subtle texture lines following the direction of the weave or molding. Show how straps compress and stretch, particularly where they contact the head. Overlapping straps create complex shadow patterns that add visual richness to your composition.
When studying material properties, examine how different surfaces interact with light. Matte surfaces scatter light broadly, creating soft shadows with indistinct edges. Glossy surfaces create concentrated highlights with sharp transitions. Translucent materials allow light to pass through while showing some opacity. These distinctions transform flat drawings into convincingly three-dimensional representations.
Consider the context of your drawing when determining material conditions. A newly manufactured mask appears clean and pristine, while a well-used mask shows weathering, dust accumulation, and surface degradation. These details enhance realism and tell a story about your subject’s history and usage.
Advanced Shading Techniques
Elevate your gas mask drawings through sophisticated shading approaches that create volume, atmosphere, and emotional impact. Cross-hatching with carefully controlled line direction creates convincing form and texture simultaneously. Vary your line weight—heavier lines in shadow areas, lighter lines in illuminated regions—to enhance depth perception.
The spherical form of the mask’s main body benefits from smooth, graduated shading. Begin with light mid-tones and gradually increase value darkness toward the shadow side. Include a subtle reflected light area on the shadow side, created by light bouncing from surrounding surfaces. This technique prevents harsh, lifeless shadows.
For atmospheric perspective, reduce contrast and detail in background areas while maintaining sharp focus and high contrast in foreground elements. If your composition includes the masked figure’s body or surrounding environment, ensure the mask remains the dominant visual element through strategic value contrast and detail emphasis.
Create depth relationships between overlapping components through value separation. The viewport should appear to sit slightly forward of the facepiece through subtle shading differences. Filter cartridges appear to project outward through the use of darker shadows on their inner surfaces where they attach to the main body.
Employ color theory if working in color media. Warm colors advance while cool colors recede, allowing you to enhance three-dimensionality through strategic color placement. Shadows on rubber components benefit from slightly desaturated warm or neutral tones, while metallic components can include cooler shadow colors.
Study how edge quality affects perception. Sharp edges appear closer and more defined, while soft, diffused edges recede into shadow or distance. The viewport’s outer edge should be sharper and more defined than the soft transitions of the rubber facepiece. This variation in edge quality creates visual interest and dimensional clarity.
Common Mistakes to Avoid
Even experienced artists fall into predictable traps when drawing gas masks. The most frequent error involves poor proportional relationships between the facepiece and filter cartridges. Cartridges that are too small or positioned incorrectly break the visual logic of the design. Spend time studying reference materials to internalize proper proportions before drawing from imagination.
Many artists struggle with viewport transparency, either making it too opaque or failing to show any internal detail. A convincing viewport shows subtle distortion of background elements, internal reflections, and perhaps a hint of the wearer’s face or breathing mechanism. Avoid simply leaving the viewport white—this appears unfinished and unrealistic.
Neglecting the head harness creates drawings that appear to float disconnected from any wearer. The straps must clearly show how they wrap around and secure the mask to a head. Include subtle indentations where straps contact the face, and show how the elastic material deforms under tension.
Another common issue is symmetry imbalance in frontal views. Use a straightedge or digital tools to ensure your center line remains perfectly vertical and that elements on both sides mirror each other appropriately. Even slight asymmetry undermines the mask’s structural credibility.
Artists often fail to show mechanical detail and functionality. Gas masks aren’t abstract forms—they’re engineered devices with specific purposes. Include details like valve mechanisms, filter threading, and air intake openings. These details demonstrate understanding and elevate your work from generic to authentic.
Avoid flat, uniform shading that makes the mask appear two-dimensional. Consistent value across large areas eliminates the illusion of volume. Instead, use varied shading to suggest the mask’s curved surfaces and complex form relationships. Include subtle variations in tone even within shadow areas.
Finally, resist the temptation to over-detail areas that should remain secondary. The viewport and central facepiece deserve maximum detail and focus, while background elements and peripheral components should show less refinement. This hierarchy guides the viewer’s eye and creates visual balance.
Understanding these common pitfalls and actively working to avoid them accelerates your skill development. Compare your work to professional reference materials and identify where your drawings diverge from reality. This critical analysis is essential for continuous improvement.
For broader context on how design and engineering principles apply to protective equipment and industrial safety, explore sustainable energy solutions and advantages of natural gas industries where such equipment plays crucial roles. Additionally, understanding clean technology alternatives provides perspective on how modern design evolves to reduce environmental impact.
FAQ
What’s the best paper for drawing gas masks?
Medium to heavyweight paper (140gsm or higher) works best, as it withstands extensive erasing and layering. Smooth paper suits detailed technical work, while slightly textured paper enhances shading techniques. Experiment with different papers to find your preference.
Should I use reference photos when drawing gas masks?
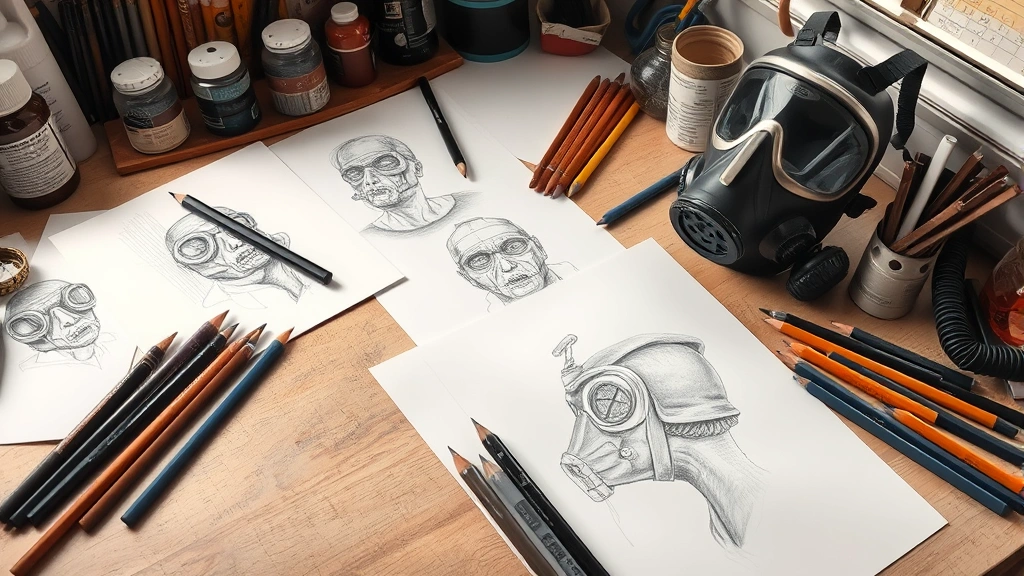
Absolutely. Reference photos are invaluable for understanding proportions, material properties, and mechanical details. Using references doesn’t diminish artistic skill—it enhances accuracy and authenticity. Combine multiple references to create original compositions.
How do I make the viewport appear transparent?
Use selective white space, subtle internal details, and strategic highlighting. Show slight distortion of background elements visible through the viewport. Include minimal internal shading to suggest transparency while maintaining clarity about the viewport’s presence and shape.
What tools do professional artists use for gas mask drawings?
Professionals employ graphite pencils (ranging from 2H to 6B), blending stumps, kneaded erasers, and quality paper. Digital artists use drawing tablets and software like Clip Studio Paint or Photoshop. The tools matter less than understanding fundamental principles.
How can I develop a personal style while drawing gas masks?
Master foundational techniques first, then experiment with exaggeration, stylization, and unique perspectives. Your personal style emerges through consistent practice and intentional choices about detail emphasis, shading approaches, and compositional decisions. Study artists whose work resonates with you, then develop your distinct voice.
Are there specific mask designs I should practice first?
Start with simpler half-mask designs before progressing to full-face respirators. Practice the frontal view extensively before attempting complex angles. Once comfortable with basic forms, explore specialized designs like military or industrial respirators.
How does understanding industrial design improve gas mask drawings?
Knowledge of how protective equipment functions and is engineered informs more authentic illustrations. Understanding environmental sustainability examples and industrial practices reveals why certain design choices exist, enabling you to draw with greater conviction and accuracy.