Testing Gas Shut Off Valve: Multimeter Tips for Water Heater Safety
Your gas water heater’s shut-off valve is a critical safety component that deserves regular attention and proper maintenance. Whether you’re a homeowner concerned about energy efficiency or a DIY enthusiast looking to understand your home’s gas systems, knowing how to test your gas shut-off valve with a multimeter can save you money and prevent dangerous situations. A malfunctioning valve can lead to gas leaks, inefficient heating, or complete system failure—all problems that compromise both your safety and your wallet.
Testing your gas water heater gas shut off valve isn’t as complicated as it sounds, but it does require the right tools, knowledge, and safety precautions. In this comprehensive guide, we’ll walk you through everything you need to know about using a multimeter to test your valve, recognize warning signs of failure, and maintain your system for optimal performance. Beyond just the technical aspects, understanding your gas shut-off valve connects to broader sustainability goals—properly functioning appliances use energy more efficiently and reduce waste, which aligns with sustainable energy solutions for modern homes.
Understanding Your Gas Shut-Off Valve
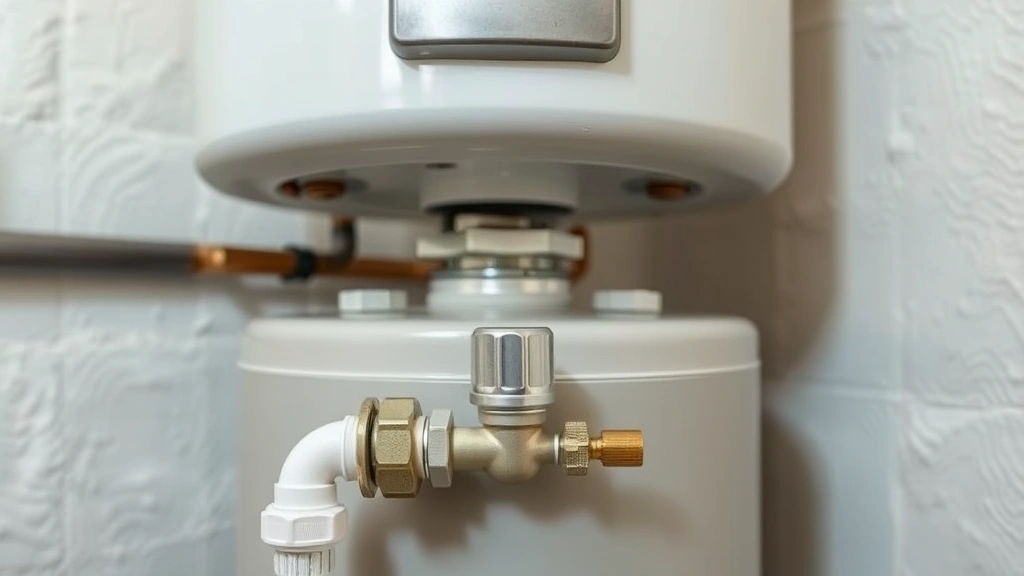
The gas shut-off valve on your water heater serves as the primary control mechanism for gas flow to your appliance. This valve, typically located at the base or side of your water heater, contains a solenoid—an electromagnetic component that opens and closes to regulate gas supply. When your thermostat signals that more heat is needed, the solenoid activates, allowing gas to flow. When the desired temperature is reached, the solenoid de-energizes, stopping gas flow and preventing wasteful heating.
Most residential water heaters use one of two valve types: gas ball valves for manual control and solenoid valves for automatic temperature regulation. The solenoid valve is what you’ll typically test with a multimeter, as it contains electrical components that can fail. Understanding the difference between these valve types helps you diagnose problems more accurately and know what tests are appropriate for your specific system. Your valve’s performance directly impacts your system’s energy efficiency, which relates to the broader conversation about natural gas furnace optimization and home energy management.
The valve’s design includes several key components: the solenoid coil, plunger, spring, and orifice. Each part plays a crucial role in maintaining safe, efficient gas delivery. When any component deteriorates, the entire system’s reliability is compromised. This is why regular testing and maintenance form the foundation of responsible appliance ownership and contribute to your home’s overall energy performance.
Why Testing Matters for Safety and Efficiency
Testing your gas shut-off valve addresses both safety and sustainability concerns. A faulty valve can leak gas, creating a dangerous environment for your family and contributing to methane emissions—a potent greenhouse gas. According to the EPA’s natural gas safety guidelines, regular maintenance and testing of gas appliances is essential for preventing accidents and detecting problems early.
From an efficiency perspective, a valve that doesn’t fully close or open properly forces your heating system to work harder, consuming more energy than necessary. This inefficiency increases your utility bills and your carbon footprint. By maintaining your gas water heater shut off valve through regular testing, you’re actively participating in reducing household energy consumption. This aligns with environmental sustainability examples that emphasize preventive maintenance as a practical way to protect our planet.
Regular valve testing also helps you catch problems before they escalate into expensive repairs or replacements. Early detection of electrical issues, corrosion, or mechanical wear allows for timely intervention. This proactive approach to home maintenance represents responsible resource stewardship—extending appliance lifespan reduces manufacturing waste and the environmental impact of producing replacement units.
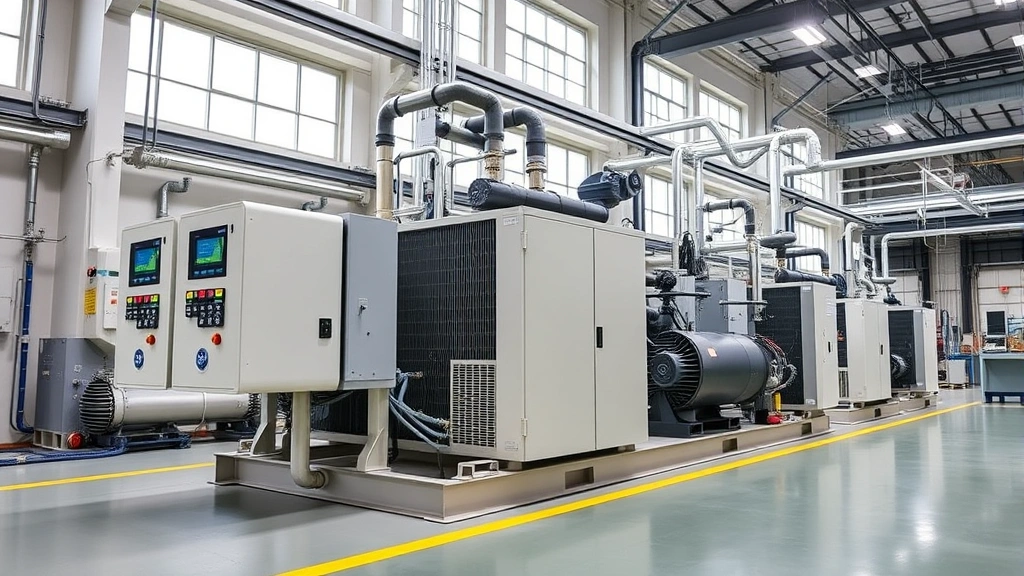
Essential Tools and Equipment
Before you begin testing your gas shut-off valve, gather the necessary tools to ensure accurate results and safe operation:
- Digital Multimeter: Choose a multimeter with voltage (AC and DC), resistance (ohms), and continuity testing capabilities. A quality digital multimeter costs $20-50 and provides reliable readings for this task.
- Safety Equipment: Wear insulated gloves and safety glasses. Have a flashlight ready for visibility in tight spaces where your water heater is installed.
- Documentation: Keep your water heater’s manual nearby for reference. It will specify voltage requirements, solenoid resistance ranges, and testing procedures specific to your model.
- Screwdrivers and Wrenches: You may need these to access the valve safely or disconnect electrical connections for testing.
- Gas Detector (Optional but Recommended): A portable gas detector adds an extra safety layer by alerting you to any gas leaks during testing.
- Notebook: Record all readings and observations for future reference and to track your system’s performance over time.
Having quality tools ensures accurate testing and reduces the risk of damaging your valve or receiving misleading readings. Investing in proper equipment is an investment in your home’s safety and long-term functionality. For those interested in understanding how various energy systems work, our guide on gas vs electric oven comparison provides useful context about gas appliance technology.
Step-by-Step Multimeter Testing Guide
Step 1: Safety First
Before touching anything, turn off the gas supply at the main valve and disconnect the power to your water heater at the circuit breaker. Wait at least 30 minutes to allow any residual charge to dissipate from the system. This critical safety step prevents electrical shock and gas exposure. Never skip this step, regardless of how confident you feel about the task.
Step 2: Locate the Solenoid Valve
Your solenoid valve is typically mounted on the gas control valve assembly at the base of your water heater. It’s usually a cylindrical component with two electrical wires connected to it. These wires deliver the signal that tells the valve to open or close. Take a photo of the current setup before disconnecting anything—this helps during reassembly.
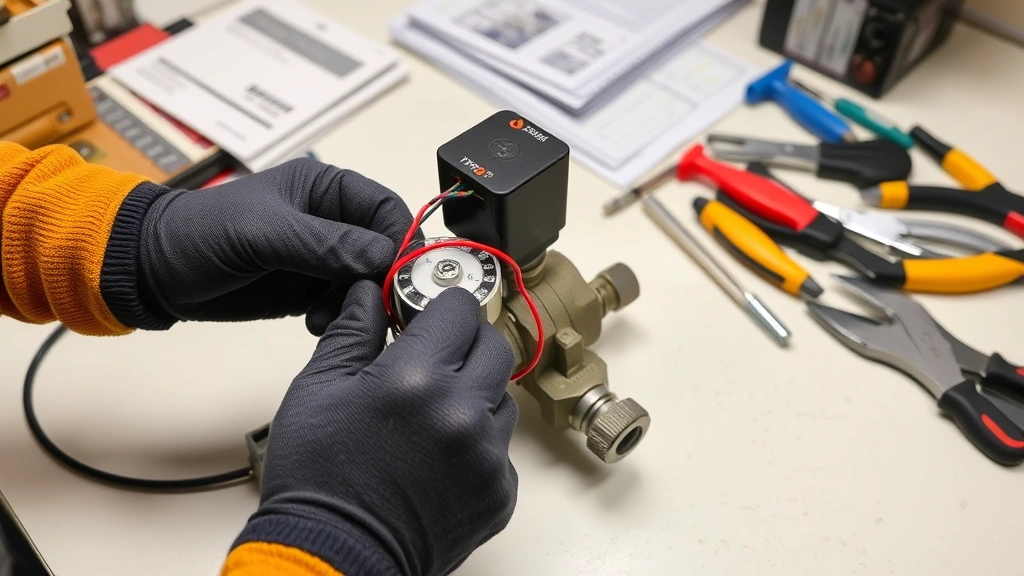
Step 3: Disconnect the Solenoid Coil
Carefully disconnect the electrical wires from the solenoid coil. Most connections use simple push-on connectors that slide off easily. If you encounter solder connections, you may need a soldering iron to safely disconnect them. Set the wires aside, ensuring they don’t touch any conductive surfaces.
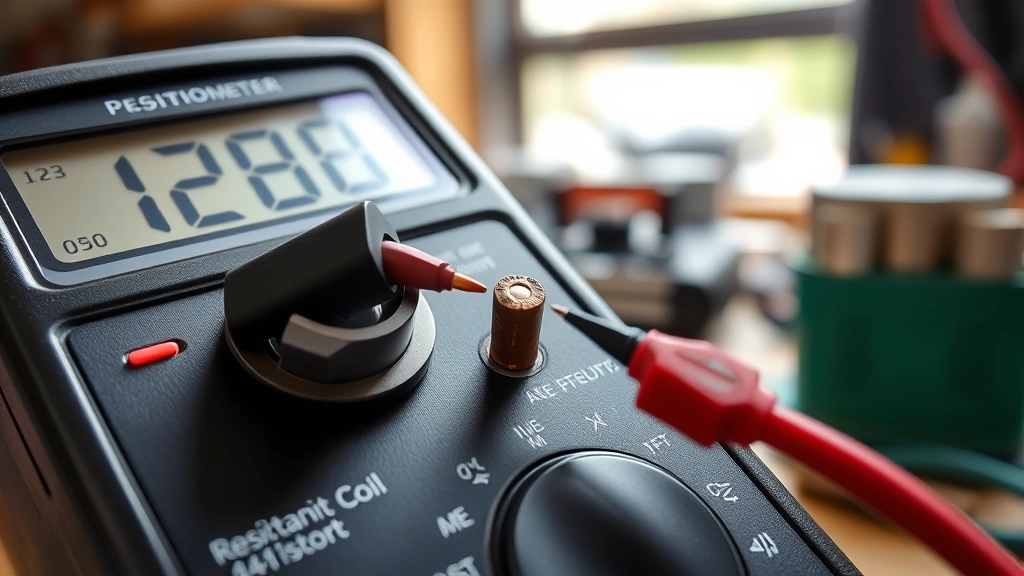
Step 4: Set Your Multimeter to Resistance (Ohms)
Turn your multimeter to the resistance setting, typically marked with the Greek letter omega (Ω). If your meter has multiple ohm ranges, start with the highest range to avoid damaging the meter. Your water heater manual should specify the expected resistance for your solenoid coil—typically between 25 and 50 ohms for most residential units, though this varies by manufacturer.
Step 5: Test the Solenoid Coil
Place one multimeter probe on each terminal of the solenoid coil. Read the resistance value displayed on your meter. Compare this reading to the manufacturer’s specifications. A reading within the expected range indicates a functioning coil. A reading significantly higher or showing infinite resistance (no continuity) indicates a failed coil that needs replacement. Zero resistance is also abnormal and suggests an internal short circuit.
Step 6: Test for Continuity
Many multimeters include a continuity test function (often marked with a sound wave symbol). This test is faster than measuring resistance and simply tells you whether electricity can flow through the coil. A beeping sound indicates continuity; silence indicates a break in the circuit. This test provides a quick pass/fail assessment of your solenoid’s integrity.
Step 7: Reassemble Carefully
Once testing is complete, reconnect the solenoid coil wires exactly as they were originally configured. Reversed polarity can cause the valve to malfunction or fail prematurely. Double-check all connections before restoring power and gas supply to your system.
Interpreting Multimeter Readings
Understanding what your multimeter is telling you is crucial for accurate diagnosis. A healthy solenoid coil typically shows resistance between 25 and 50 ohms, though your specific model may vary. Always consult your water heater’s manual for the exact specification before concluding that a reading is abnormal.
Normal Readings: A resistance measurement within the manufacturer’s specified range indicates a functioning solenoid coil. Continuity test should produce a beeping sound with no interruption. These readings mean your valve’s electrical component is in good working order.
High Resistance Readings: If your multimeter shows resistance significantly higher than specified but not infinite, your solenoid coil may be partially degraded. This often occurs due to age, corrosion, or moisture infiltration. While the valve may still function, it’s approaching failure and should be monitored closely or replaced preventively.
Infinite Resistance (No Continuity): When your multimeter shows infinite resistance or produces no beep during continuity testing, the solenoid coil has failed completely. An open circuit within the coil prevents electricity from flowing through it. This valve must be replaced immediately, as it cannot function properly.
Zero Resistance: If your multimeter shows zero ohms or very close to it, an internal short circuit exists within the solenoid coil. This is dangerous and indicates immediate replacement is necessary. A short circuit can cause electrical hazards and prevent proper valve operation.
Fluctuating Readings: If your meter displays unstable or constantly changing numbers, you may have a loose connection or a partially broken wire. Check all connections carefully. Fluctuating readings during testing are abnormal and suggest an electrical problem requiring professional evaluation.
Common Issues and Troubleshooting
Even with proper testing, you may encounter complications. Understanding common problems helps you troubleshoot effectively and know when professional help is necessary.
Issue: Multimeter Won’t Power On
Check the battery first. Most multimeters use standard 9V or AA batteries that need periodic replacement. Ensure the battery contacts are clean and properly seated. If the battery is fresh and the meter still won’t power on, the device may be defective and needs replacement.
Issue: Inconsistent Readings
Inconsistent multimeter readings often result from poor probe contact with the solenoid terminals. Ensure the terminals are clean and free of corrosion. Press the probes firmly and steadily against the terminals. If readings remain unstable, the solenoid coil itself may be failing.
Issue: Valve Fails Test But Water Heater Still Works
A failed electrical test doesn’t always mean the valve is non-functional—it means the electrical component is compromised. The mechanical aspects may still work temporarily. However, continued operation without replacement risks complete failure at an inconvenient time. Replace the valve promptly.
Issue: Gas Smell During Testing
If you detect a gas odor while testing, immediately stop what you’re doing. Turn off the main gas supply, open windows for ventilation, and leave the area. Call your gas company’s emergency line from outside your home. Do not attempt to locate the source yourself. Gas leaks are serious safety hazards.
Issue: Can’t Access the Solenoid Connections
Some water heater models have solenoid connections in tight or awkward locations. If you cannot safely access the connections without risk of damaging surrounding components, contact a licensed plumber or HVAC technician. Forcing access could damage your water heater or create safety hazards.
Maintenance Best Practices
Regular maintenance extends your valve’s lifespan and prevents unexpected failures. These practices complement your testing routine and support overall system reliability.
Annual Inspections: Schedule annual inspections of your gas shut-off valve, ideally during fall before heating season begins. Look for visible corrosion, loose connections, or signs of gas leaks (hissing sounds or rotten egg odor). Document your observations to track changes over time.
Keep the Area Clean: Dust and debris can accumulate around your valve and water heater. Regular cleaning prevents corrosion and allows you to spot problems early. Ensure the area around your water heater remains dry, as moisture accelerates component degradation.
Check Connections Regularly: Vibration from the water heater’s operation can gradually loosen electrical connections on the solenoid. Every six months, visually inspect the connections to ensure they’re tight and secure. A loose connection can prevent proper valve operation or cause intermittent failures.
Monitor Performance: Pay attention to your water heater’s behavior. If you notice delayed heating response, inconsistent water temperature, or unusual sounds, these may indicate valve problems. Early detection allows for planned maintenance rather than emergency repairs.
Document Everything: Keep detailed records of all testing, maintenance, and repairs. This documentation helps you identify patterns, plan future maintenance, and provides valuable information if you ever need to consult a professional. Records also help with resale value if you ever sell your home.
Proper maintenance of your gas water heater connects to broader sustainable energy solutions for your home. Well-maintained systems operate more efficiently, consume less energy, and have longer functional lifespans—all factors that reduce environmental impact.
When to Call a Professional
While testing your gas shut-off valve is a manageable DIY task, certain situations warrant professional expertise. Knowing when to call a licensed technician prevents costly mistakes and ensures your safety.
When to DIY: If you’re comfortable working with basic tools, can safely access your valve, and your multimeter readings are straightforward (clearly normal or clearly abnormal), testing is appropriate for a confident homeowner. Routine testing and documentation fall within the DIY category.
When to Call a Pro: If you detect a gas leak, cannot safely access the valve, receive confusing multimeter readings, need to replace the valve, or feel uncomfortable at any point during the process, contact a licensed professional. HVAC technicians and plumbers have specialized training, proper tools, and insurance to handle these tasks safely. Gas-related work often requires permits and inspections—professionals understand local codes and requirements.
Professional technicians can also perform comprehensive system diagnostics beyond simple valve testing. They can assess your entire gas delivery system, check for leaks with specialized equipment, verify proper pressure, and ensure compliance with safety standards. For complex issues or if your system is older, professional evaluation is wise.
Finding a qualified professional: Look for technicians certified by organizations like the National Fire Protection Association (NFPA), which sets standards for gas appliance installation and maintenance. Verify licenses, check references, and get written estimates before committing to work.
Your investment in professional expertise today prevents dangerous situations and expensive emergency repairs tomorrow. This preventive approach aligns with responsible home stewardship and the broader principle of maintaining systems for long-term safety and efficiency.
FAQ
How often should I test my gas water heater’s shut-off valve?
Annual testing is recommended for most residential systems. If your water heater is older than 10 years or you’ve experienced previous valve issues, consider testing twice yearly. More frequent testing provides extra assurance but isn’t necessary for newer systems in good condition.
Can I test the valve while the system is powered on?
No. Always turn off power at the circuit breaker and close the main gas supply before testing. Testing live systems risks electrical shock and gas exposure. Wait 30 minutes after shutting down to ensure all residual charge dissipates.
What does it mean if my multimeter shows infinite resistance?
Infinite resistance means no electrical continuity exists in the solenoid coil. The circuit is completely broken, and the valve cannot function. This requires immediate replacement. Do not attempt to repair the solenoid coil itself—replacement is the only safe solution.
Is it dangerous to test the valve myself?
Testing is relatively safe if you follow proper precautions: turn off power and gas supply, wait for residual charge to dissipate, use proper tools, and know when to stop and call a professional. The main risks come from improper procedure or attempting repairs beyond your skill level. When in doubt, consult a professional.
Can a valve fail suddenly without warning?
While some failures occur suddenly, most valves show gradual degradation detectable through regular testing. This is why annual testing is valuable—it catches problems early. However, environmental factors like moisture, corrosion, or electrical surges can occasionally cause sudden failures.
What’s the difference between a gas ball valve and a solenoid valve?
A gas ball valve is manually operated—you physically turn a handle to open or close it. A solenoid valve is electrically controlled—it opens and closes automatically based on signals from your thermostat. Most water heaters use solenoid valves for automatic temperature control. Only solenoid valves require multimeter testing.
How much does it cost to replace a failed shut-off valve?
Solenoid valve replacement typically costs $150-400 including labor for professional installation. DIY replacement (if you have plumbing skills) costs $50-150 for the valve itself. Professional replacement ensures proper installation and compliance with safety codes.
Can I use my multimeter to test other home appliances?
Yes. Multimeters can test electrical components in various appliances—dryers, stoves, refrigerators, and more. The testing principles are similar: understanding what normal readings should be, checking for continuity, and recognizing failed components. Always consult appliance-specific manuals for expected resistance values and testing procedures.
What safety precautions matter most when testing a gas valve?
The three most critical precautions are: (1) turn off power at the circuit breaker, (2) close the main gas supply valve, and (3) wait 30 minutes for residual charge to dissipate. These steps prevent electrical shock and gas exposure. Never skip these steps regardless of how quick you think the test will be.
Should I replace my valve preventively if it’s old but still testing normally?
If your valve tests within normal parameters, replacement isn’t immediately necessary. However, if your water heater is more than 15 years old, the valve is likely aging. Consider preventive replacement if the valve is original equipment, even if it still functions. Preventive replacement prevents emergency failures during cold weather when you need heat most.